id_and_secret <- "ABCDEF:1a2b3c4d5e6f"

RCurl::base64Encode(id_and_secret)
[1] "QUJDREVGOjFhMmIzYzRkNWU2Zg=="
attr(,"class")
[1] "base64"jsonlite::base64_enc(id_and_secret)[1] "QUJDREVGOjFhMmIzYzRkNWU2Zg=="Here we’ll connect a Fitbit account to Make, grab summary data for the current day, and feed it to Airtable.
Again, there’s nothing special about using Airtable here. We could just as easily feed it to Google Sheets or whatever. This is just to show another way you can store stuff. I used Airtable here because I was already using it for other things like tracking my research projects and submissions, so I just decided to stick the Fitbit data there too, because why not.
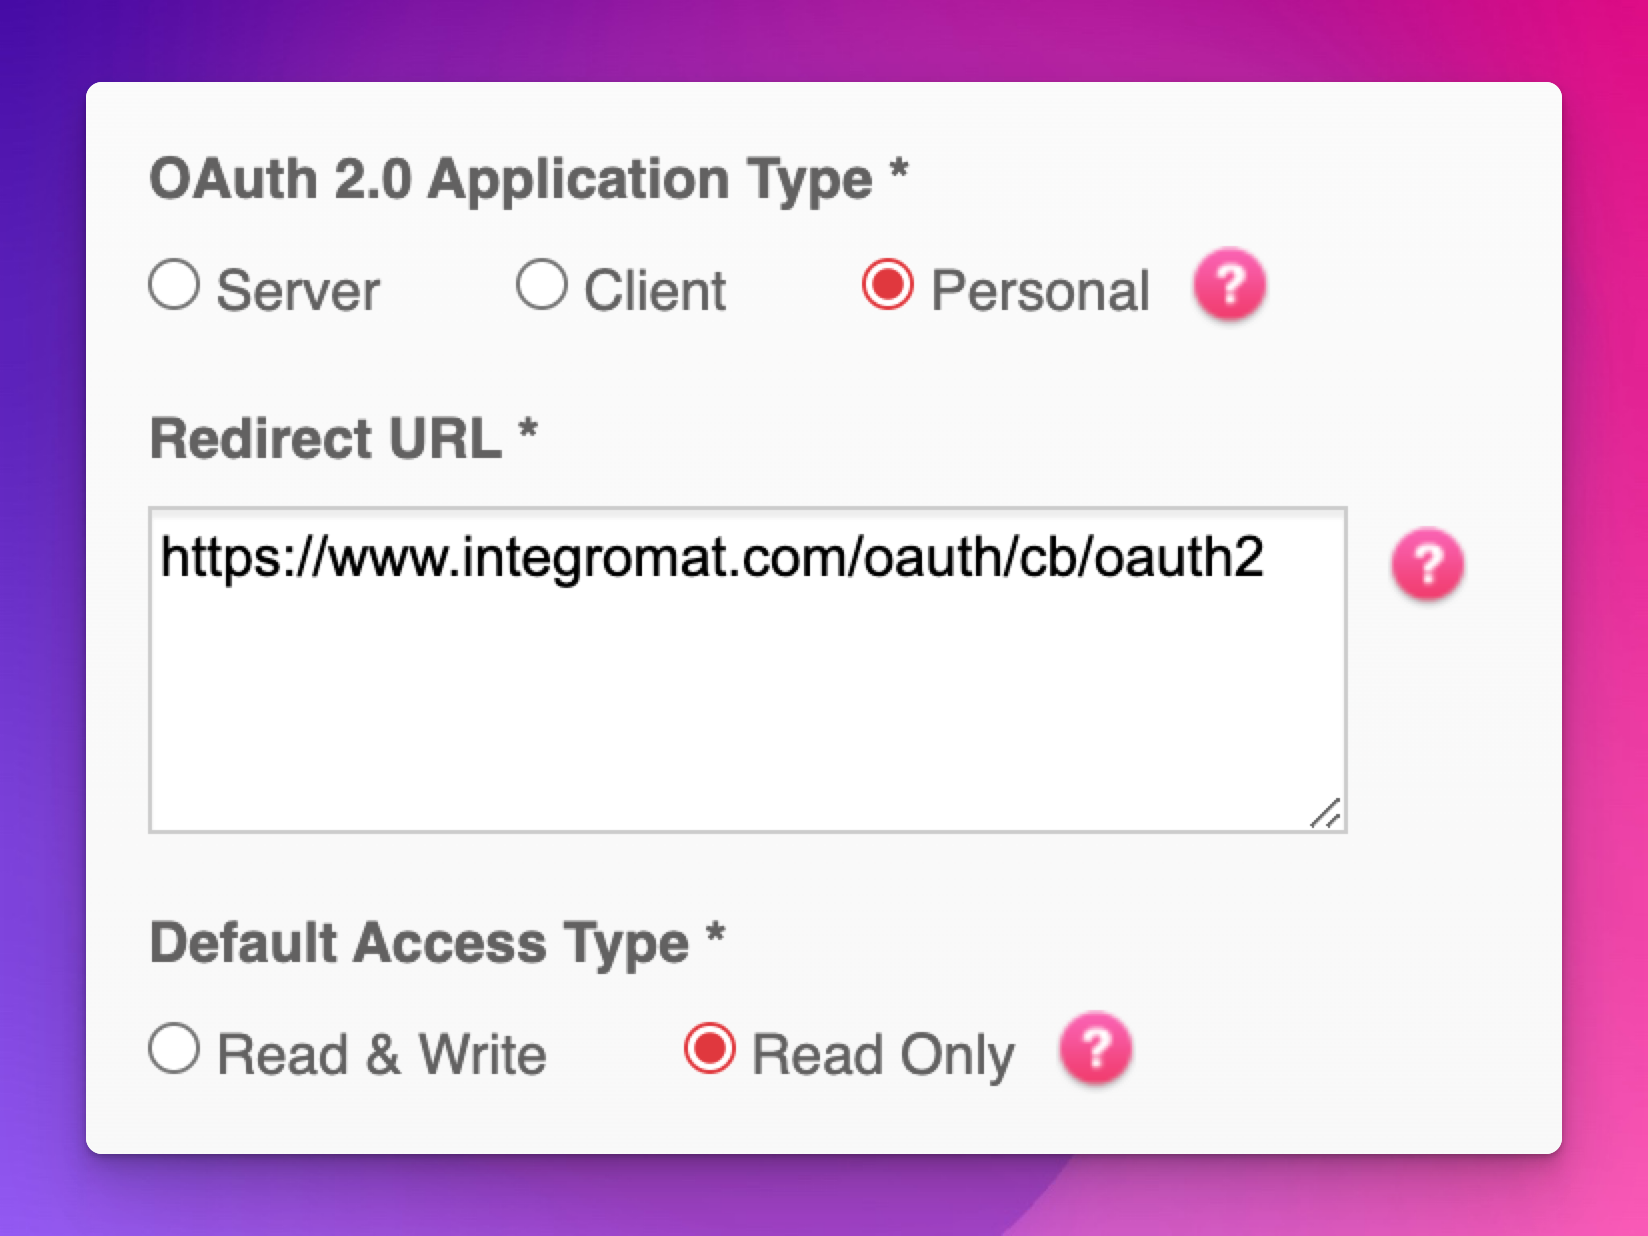
Go to dev.fitbit.com and register a new application. You can put whatever details you want for all the different URLs, except for the OAuth redirect URL, which needs to be https://www.integromat.com/oauth/cb/oauth2 (see Make’s instructions for more about that). Choose a “Personal” application type and “Read Only” access (unless you want to be able to edit your Fitbit data somehow)
You should now have some new details, like a client ID, client secret, and some URLS for authorizing and renewing the OAuth token:
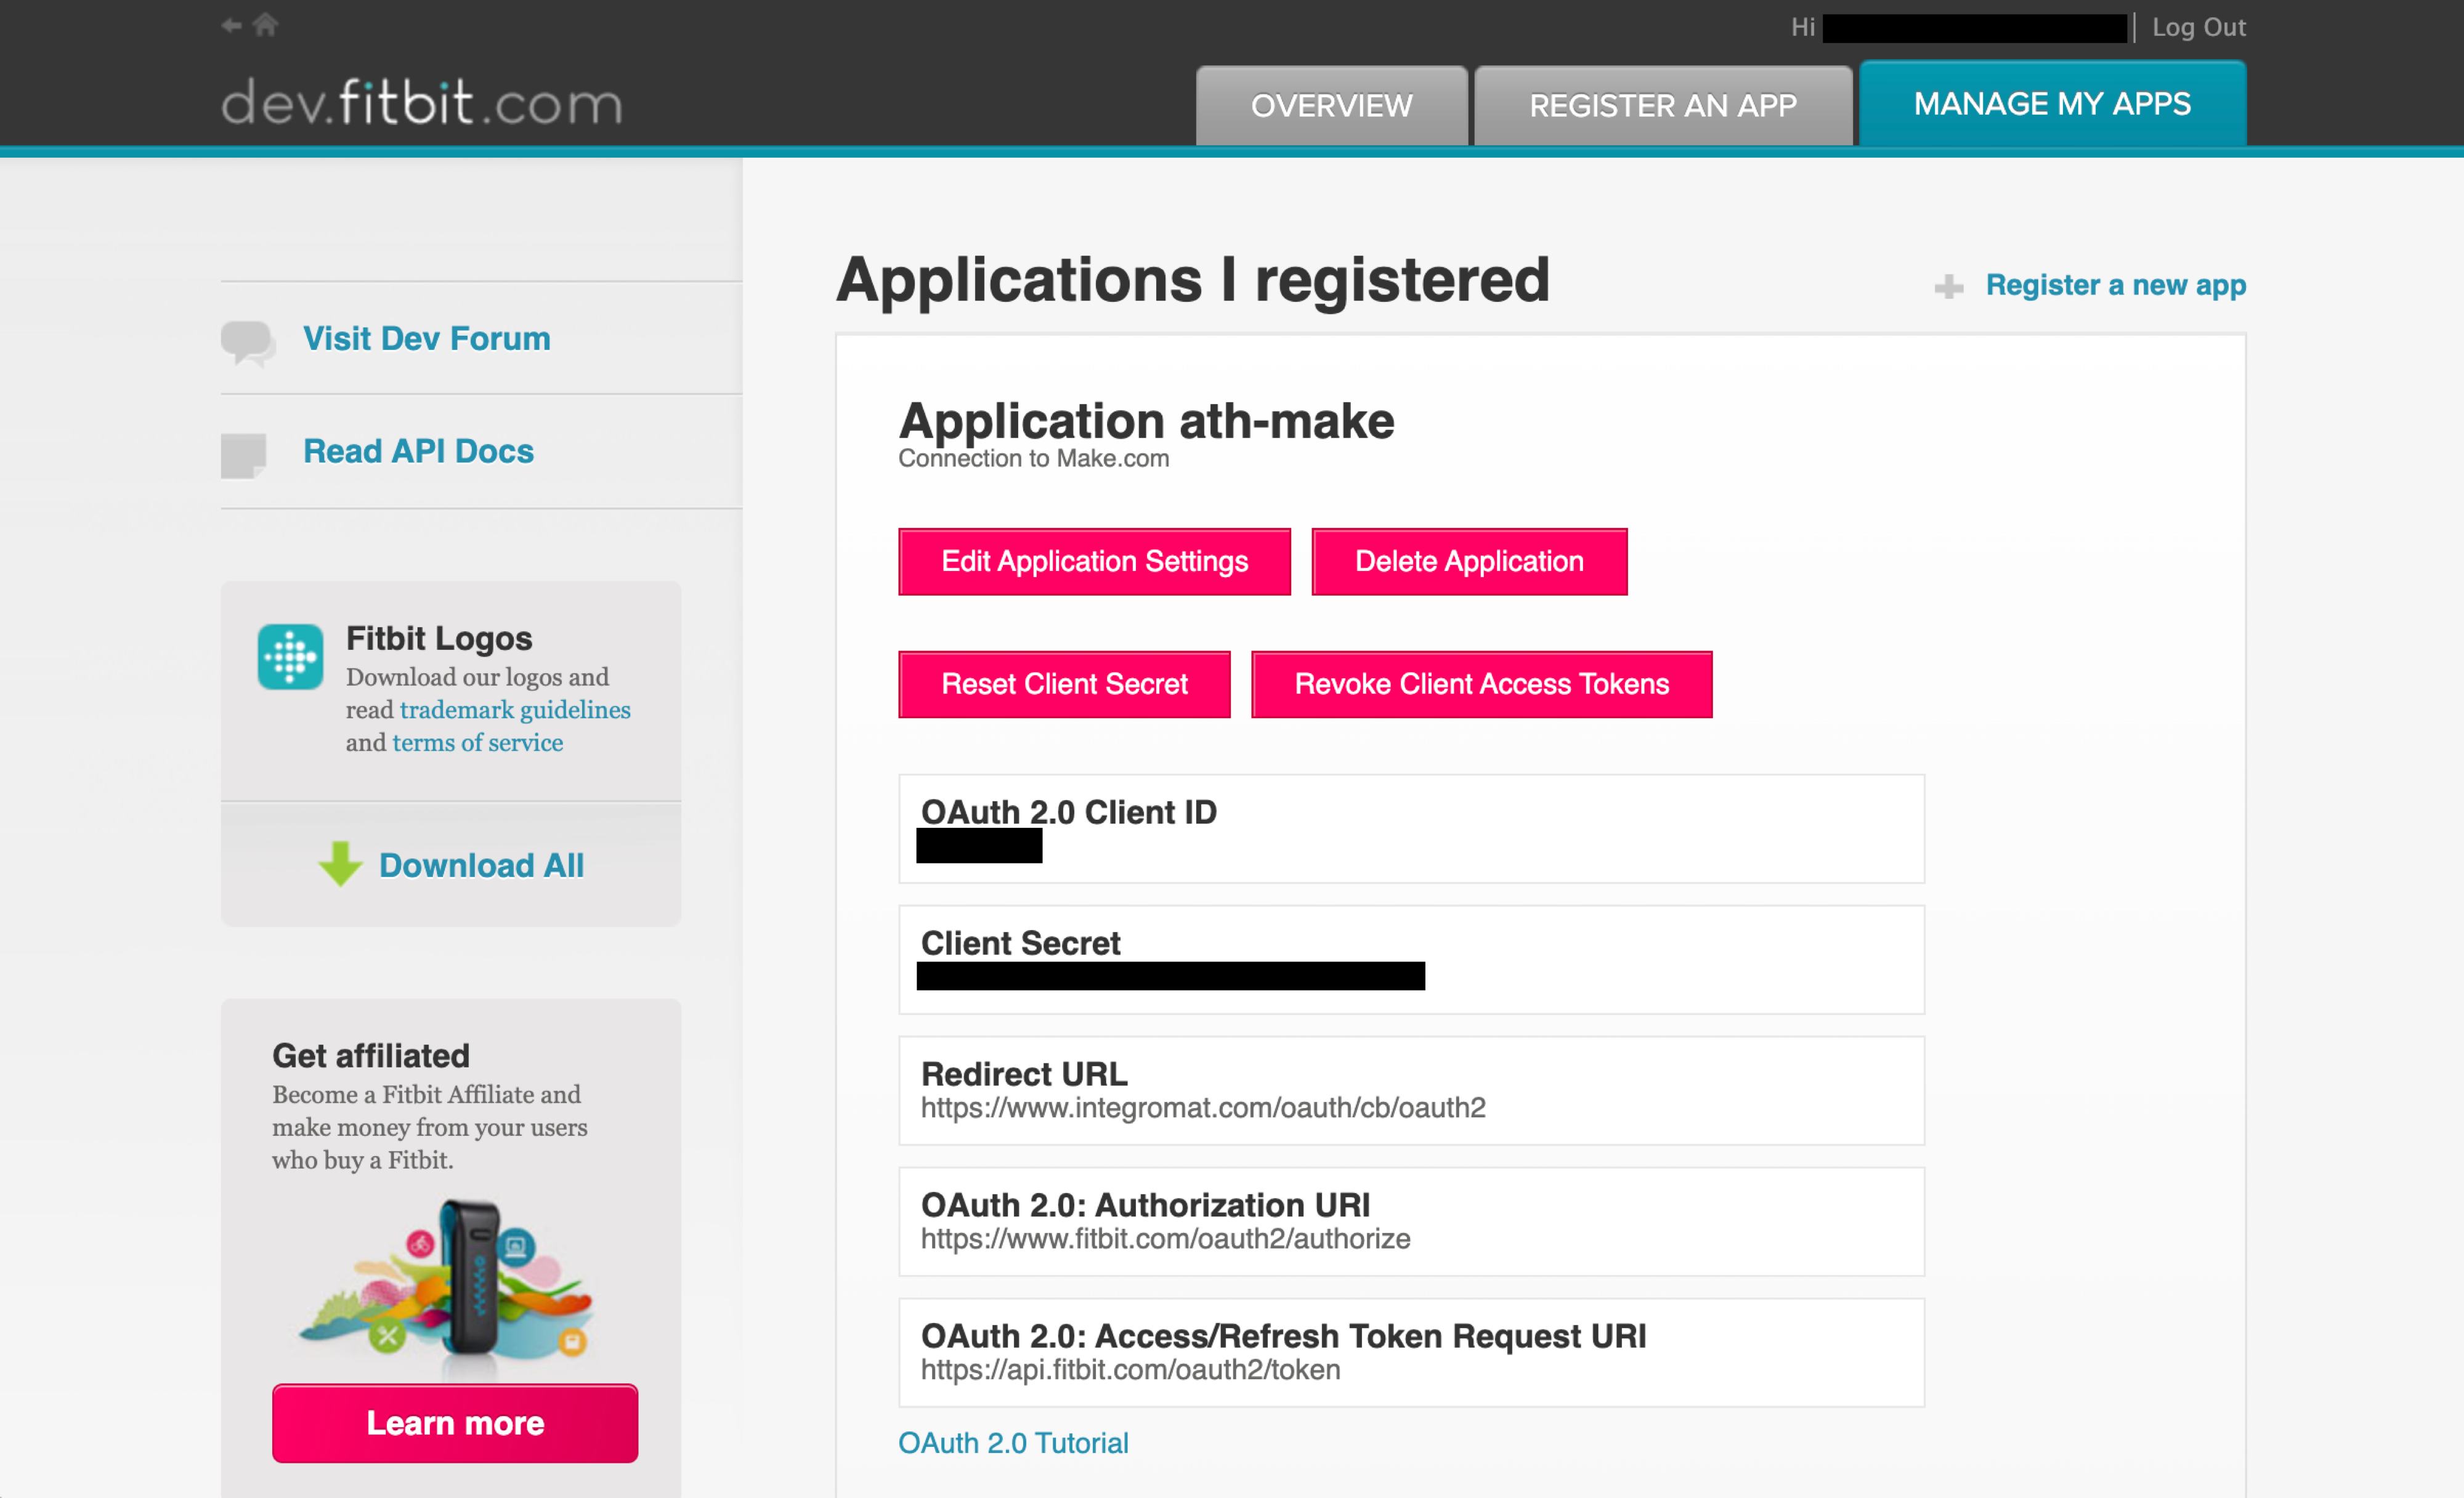
If you click on that little “OAuth 2.0 Tutorial” link down at the bottom, it’ll open some interactive documentation for how to use the client ID and secret and interact with the API.
You can also see complete details of the API at Fitbit’s documentation. For instance, here we’re most interested in grabbing daily summary data, which includes details about steps, exercises, resting heart rate, sleep score, and other stuff. There are other more specific endpoints you can use too, like just your breathing rate, or just your sleep details, etc.
Phew. Now that that initial connection is working, we don’t have to worry about it ever again. We could do all this manually with R, like with the older {fitbitr} package, or even accessing the API with {httr2}, but then we’d have to store the token somewhere and refresh it regularly. Make handles all that for us.
We can now use that logged-in session to grab data from the API. In the HTTP module that we’ve been working with, set the URL to whatever API endpoint you’re interested in. Here we want daily summary data, which uses a URL like this:
https://api.fitbit.com/1/user/-/activities/date/2024-01-01.jsonWe’ll make this more dynamic in a bit, but for now, put that URL in the dialog and save it:
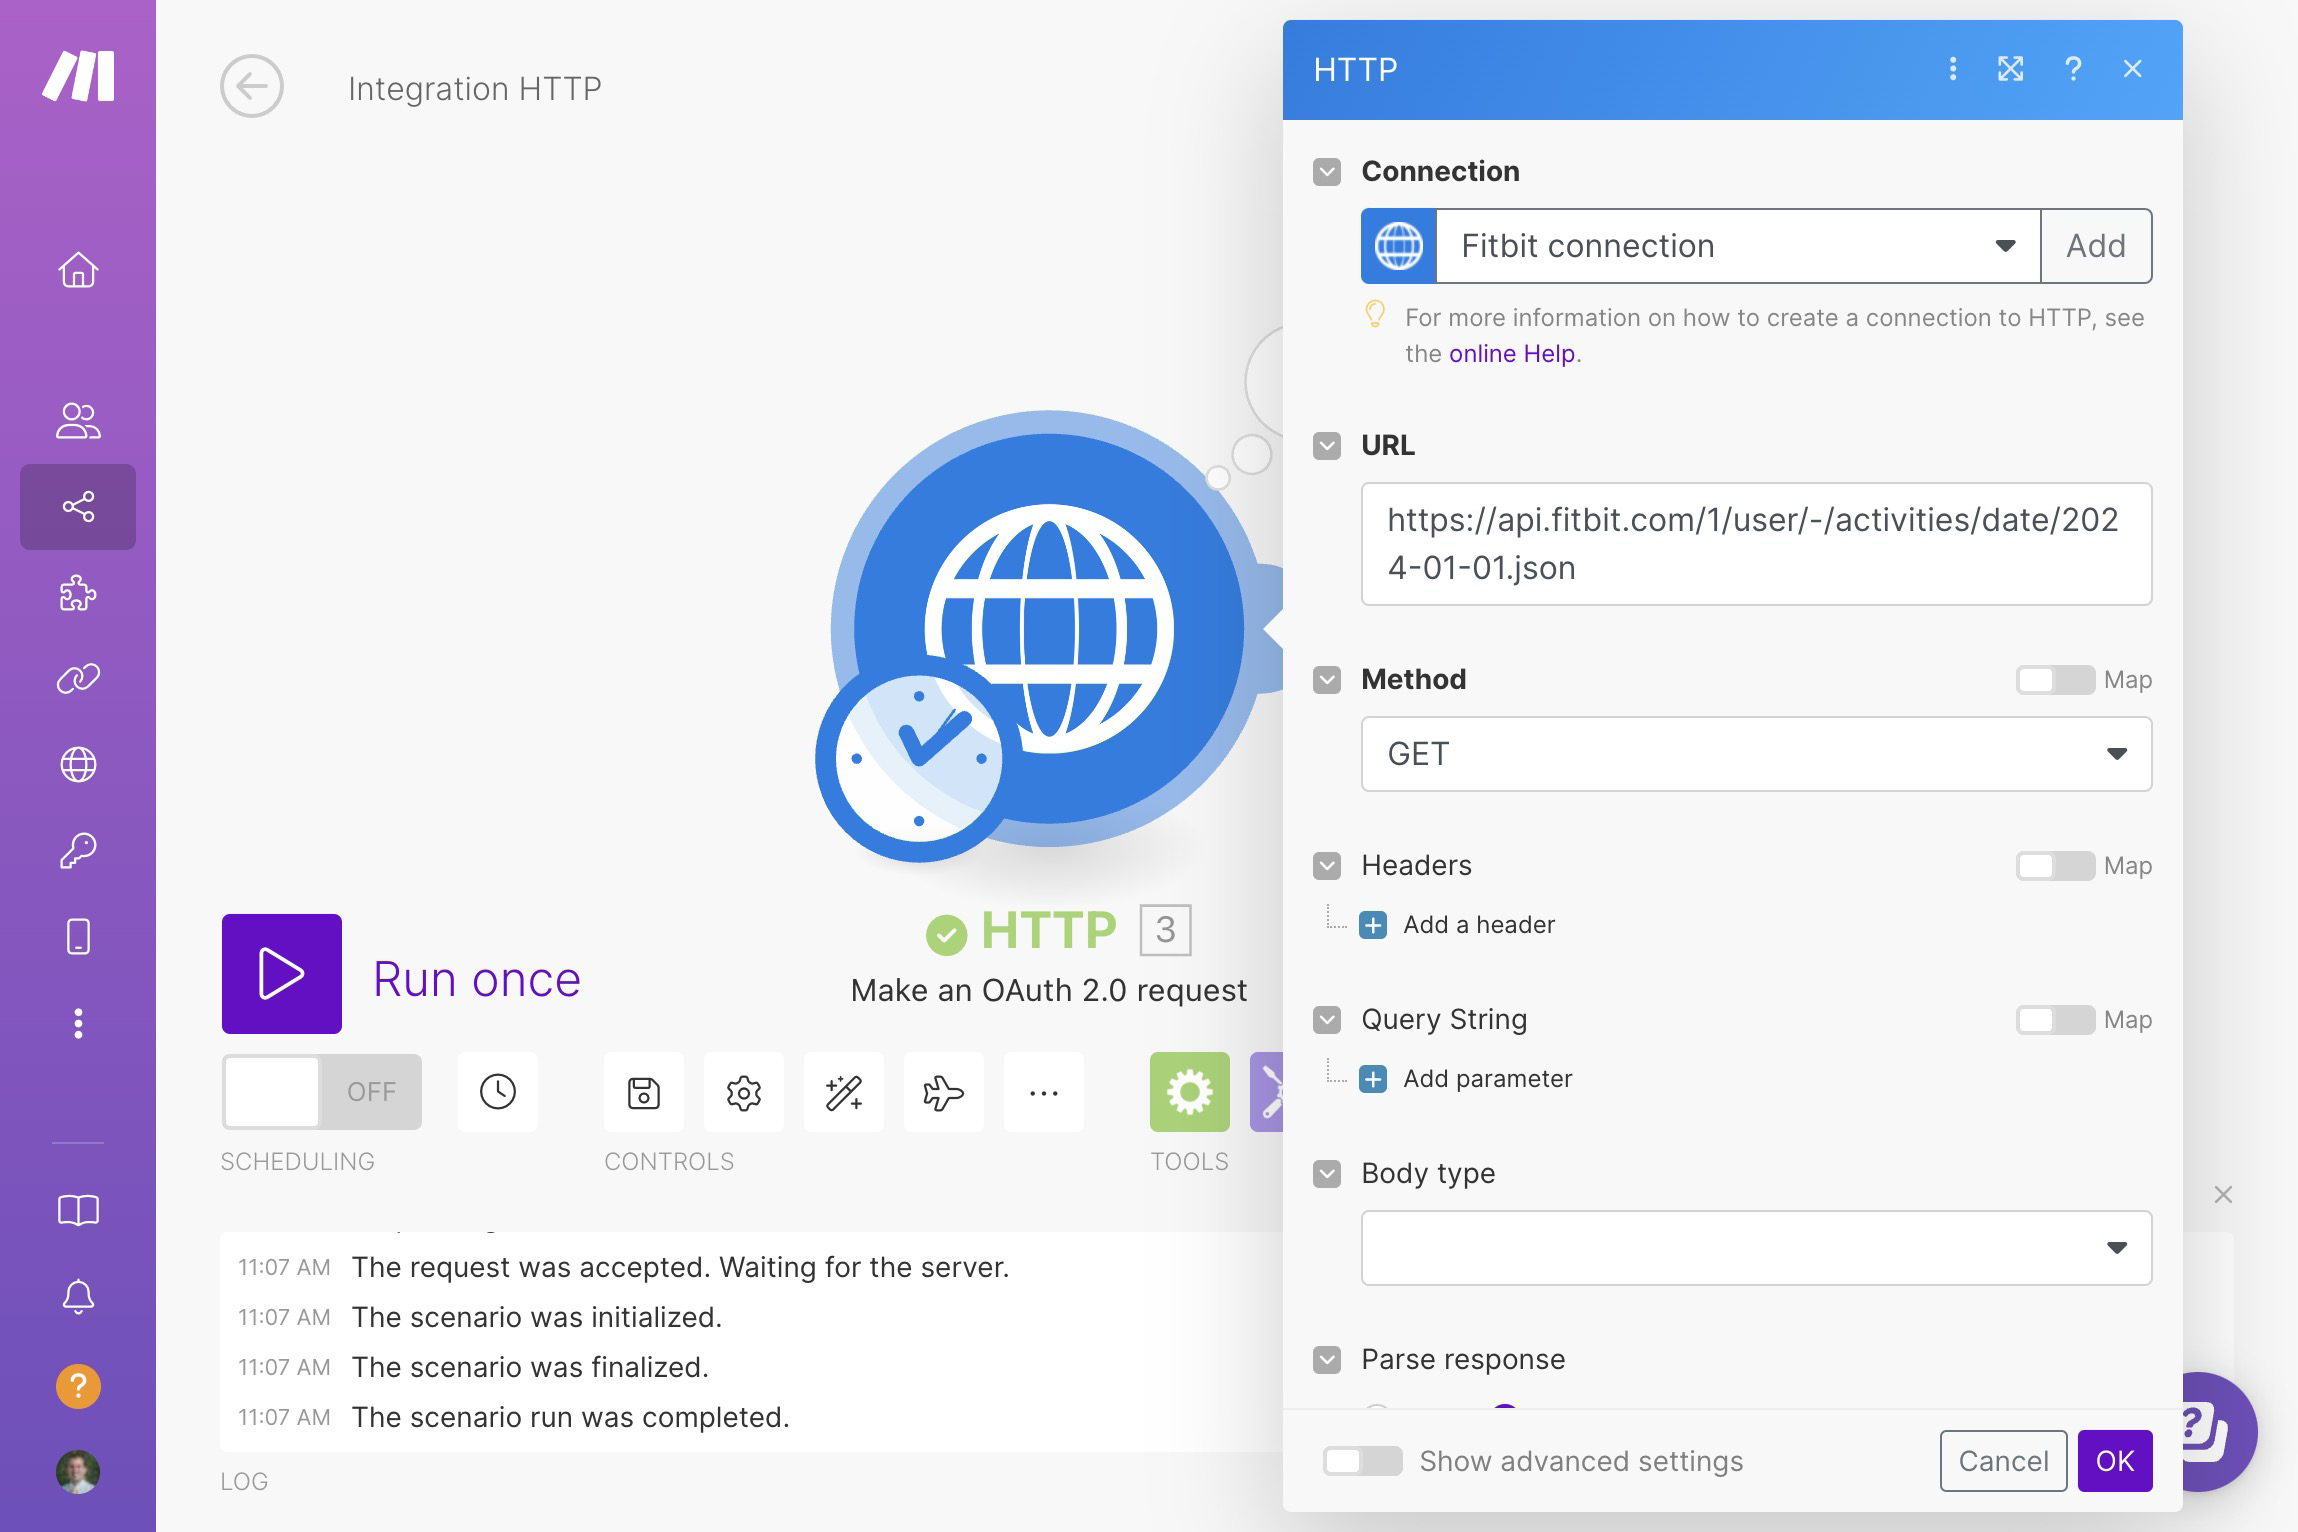
Click “OK” in the module settings and then click on the “Run once” button to test it out. You should get a little thought bubble with a “1” in it showing that there were results. Click on it to see those results. Scroll down to the output section, click on the + next to “Data” and you should see a bunch of JSON:
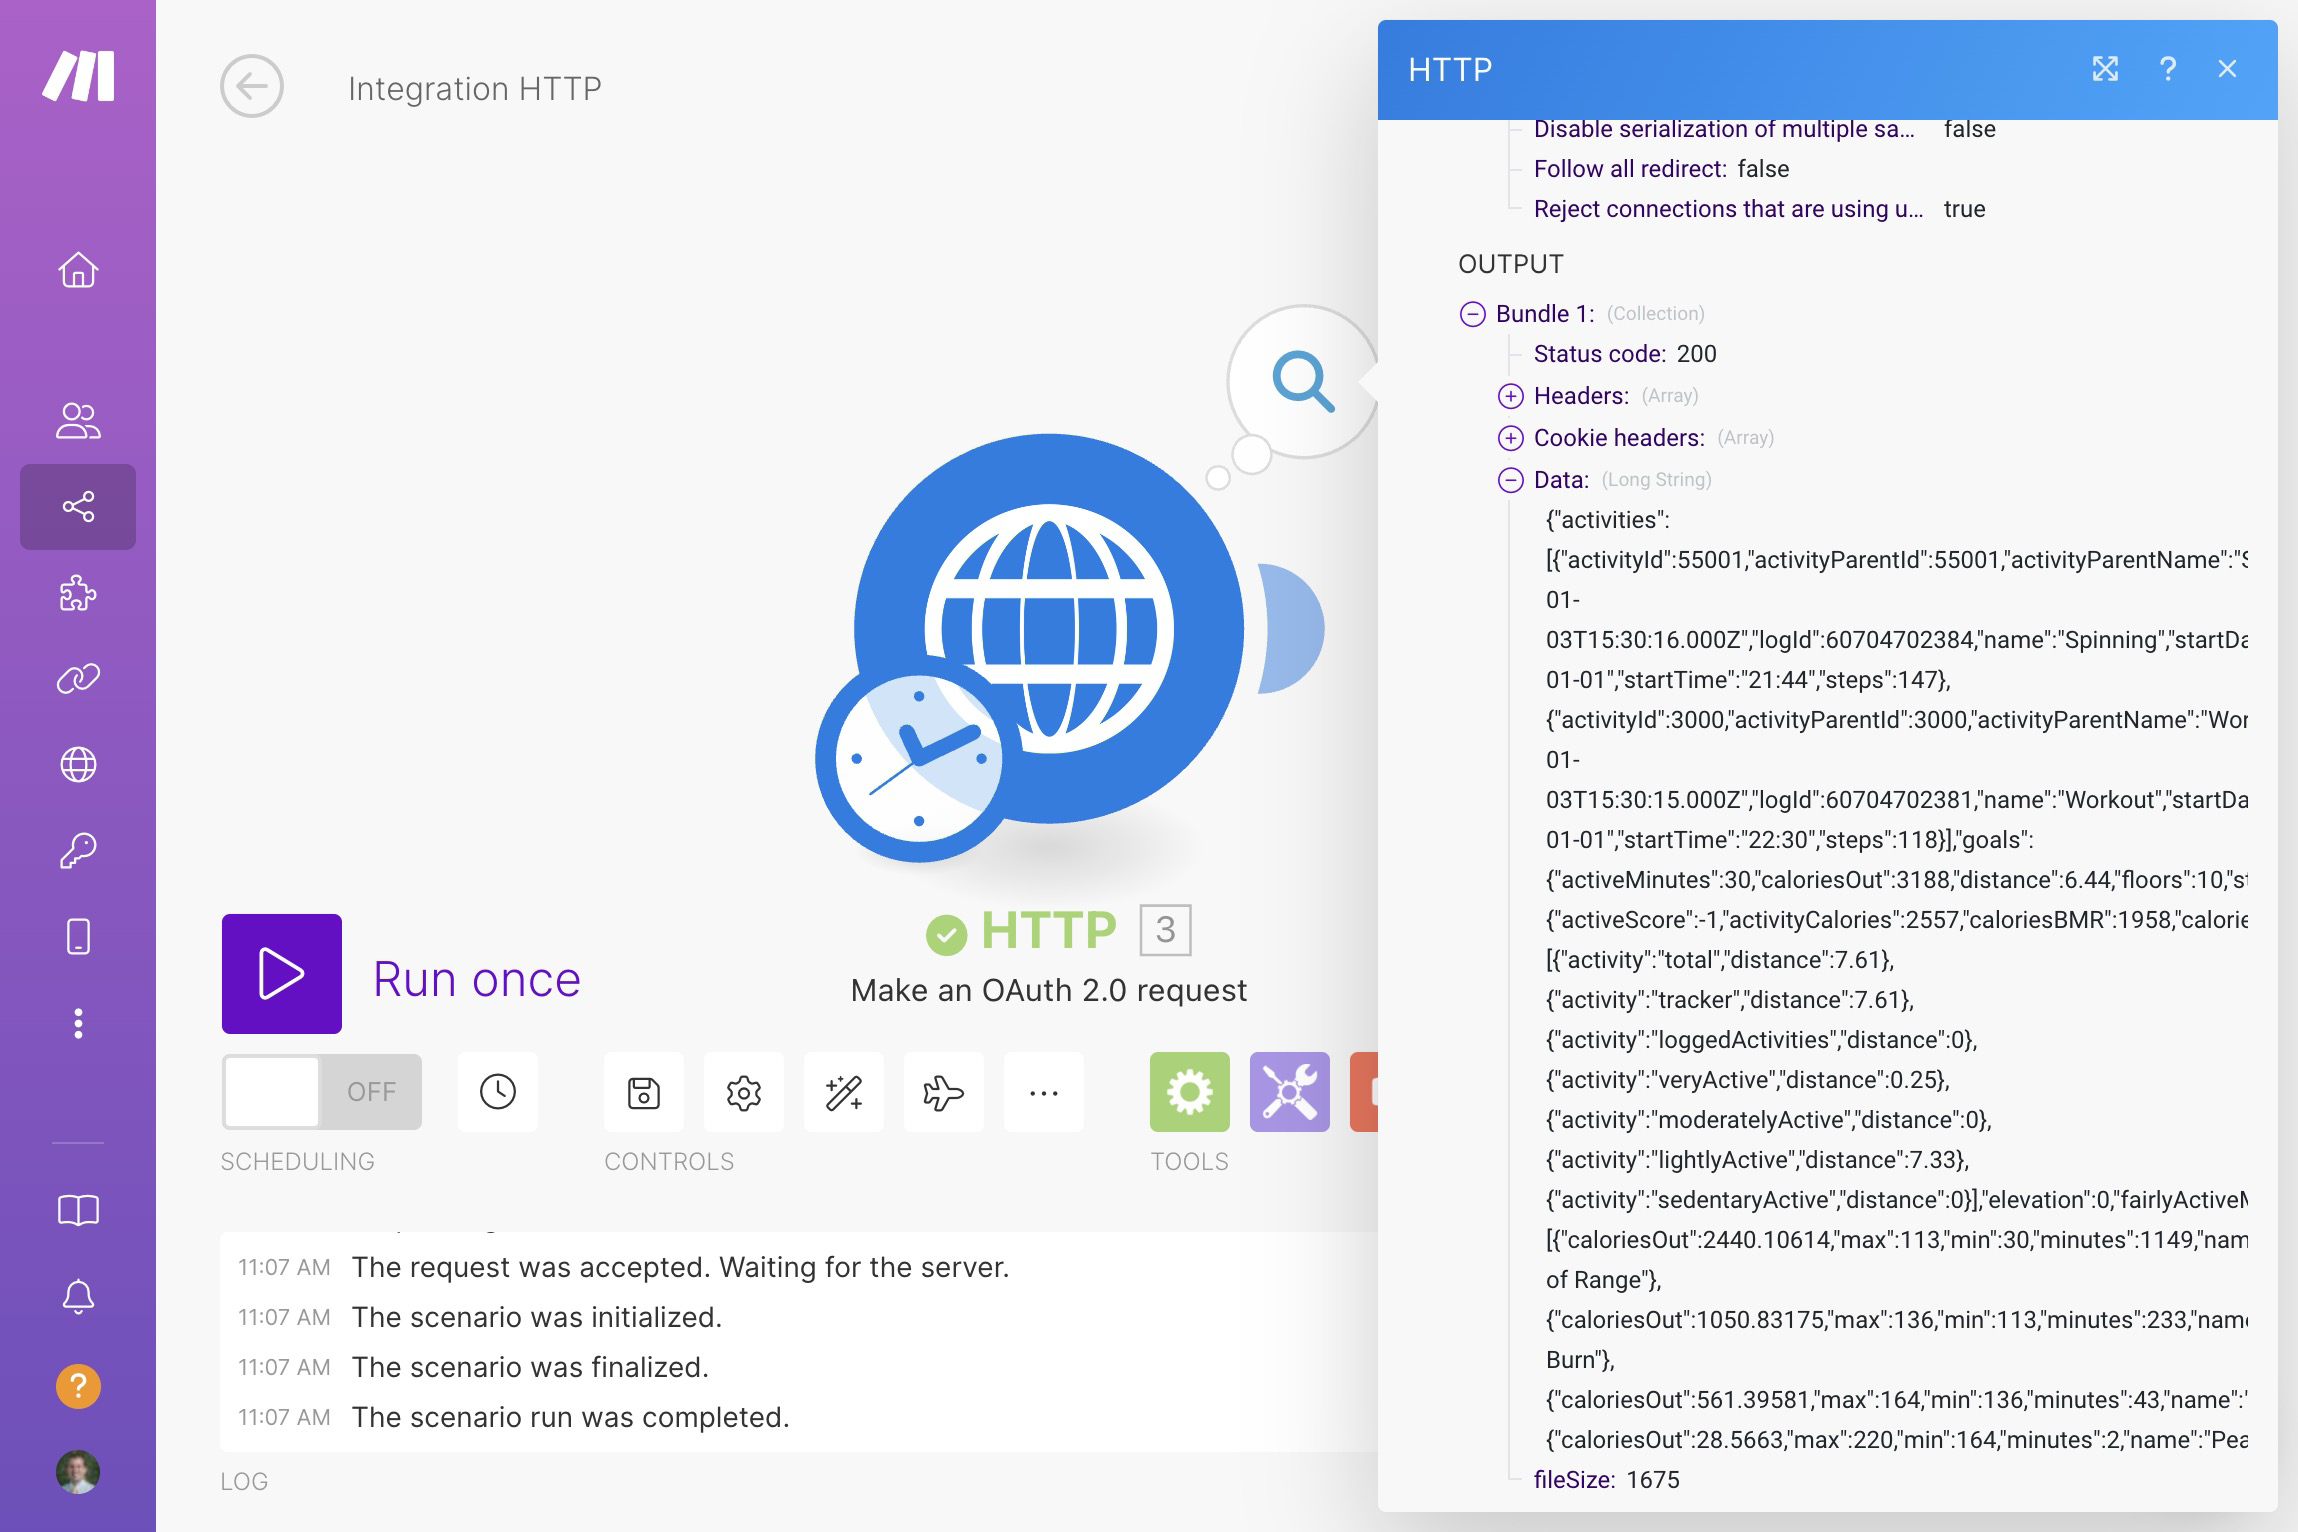
It worked!
However, we’ve hardcoded the date in the module. We want this to be more dynamic. In my case, I use my workflow to grab yesterday’s data every day at 10 PM (so that the Fitbit app on my phone has enough time to sync with the server). So we need to somehow generate a correctly formatted date for yesterday.
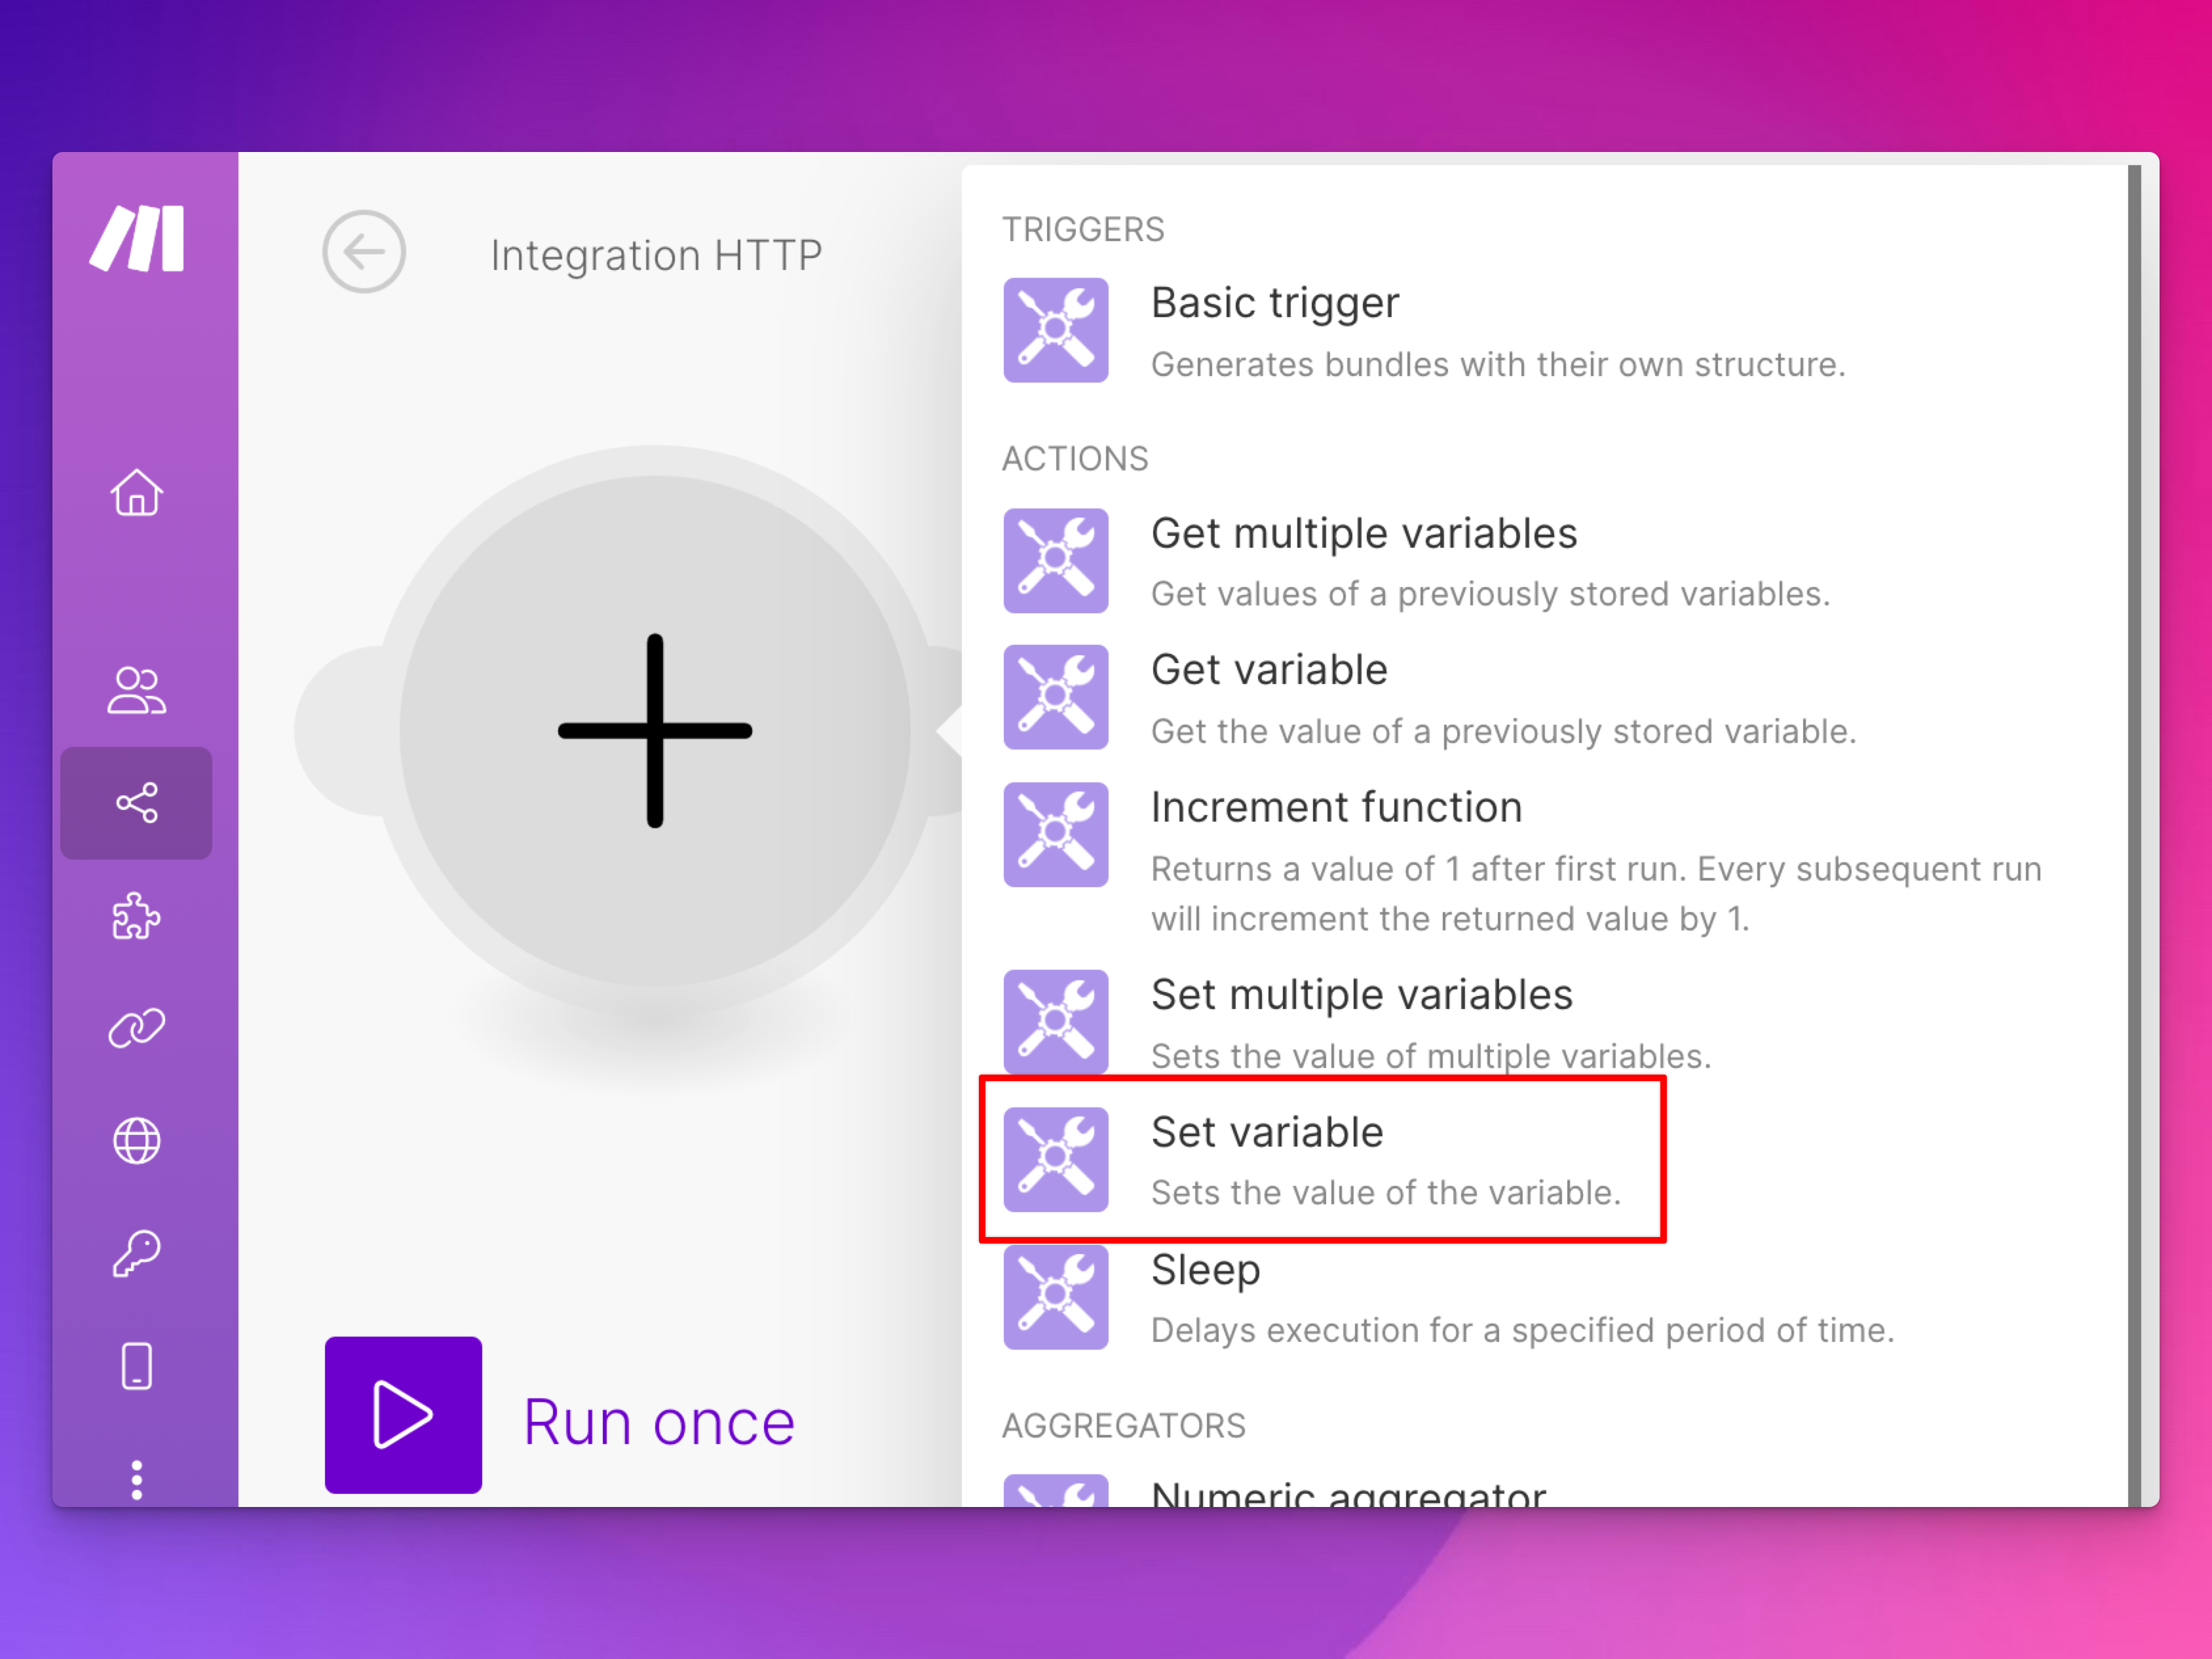
Add a new module and search for “set variable”:
Name the variable something and then click in the “Variable value” field. Make will open a little dialog with lots of possible programming-related options. Click on the calendar icon to see time-related things:
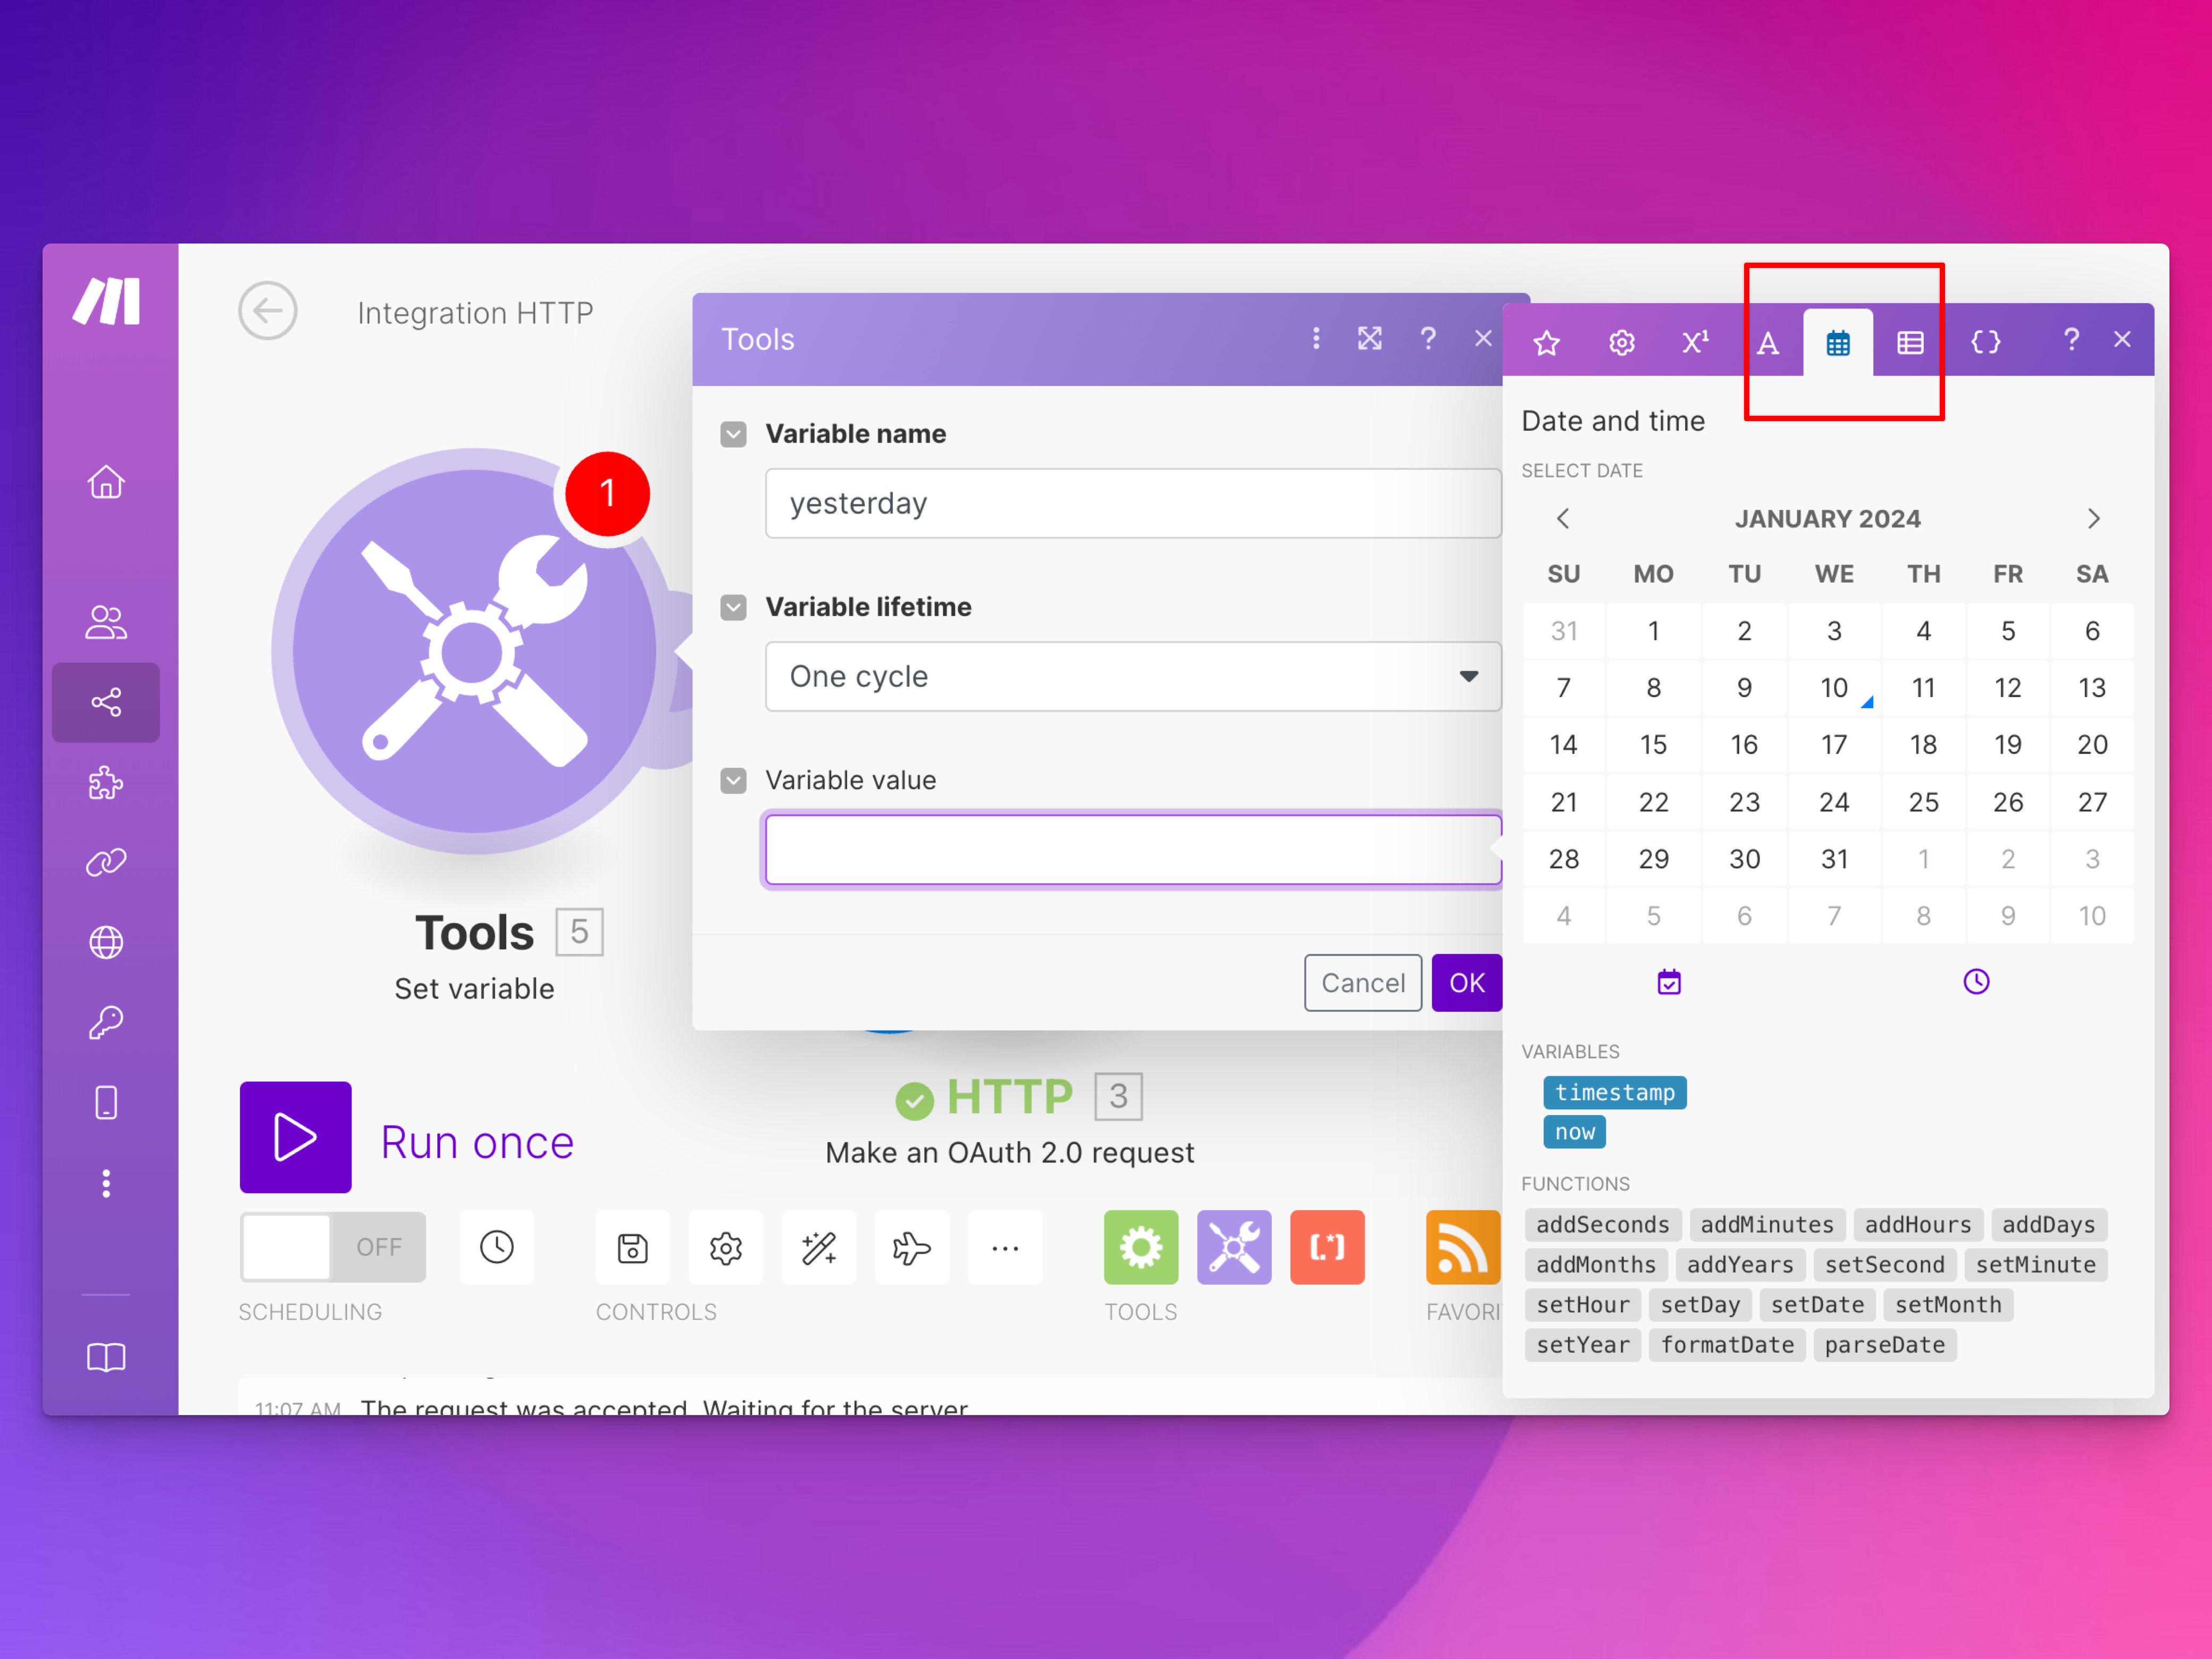
Using the different buttons in that dialog (you have to click on the function names and the “now” variable; you can’t just type them), use this as the value:
formatDate(addDays(now; -1); YYYY-MM-DD)That will subtract a day from the now timestamp and then format the resulting day as YYYY-MM-DD.
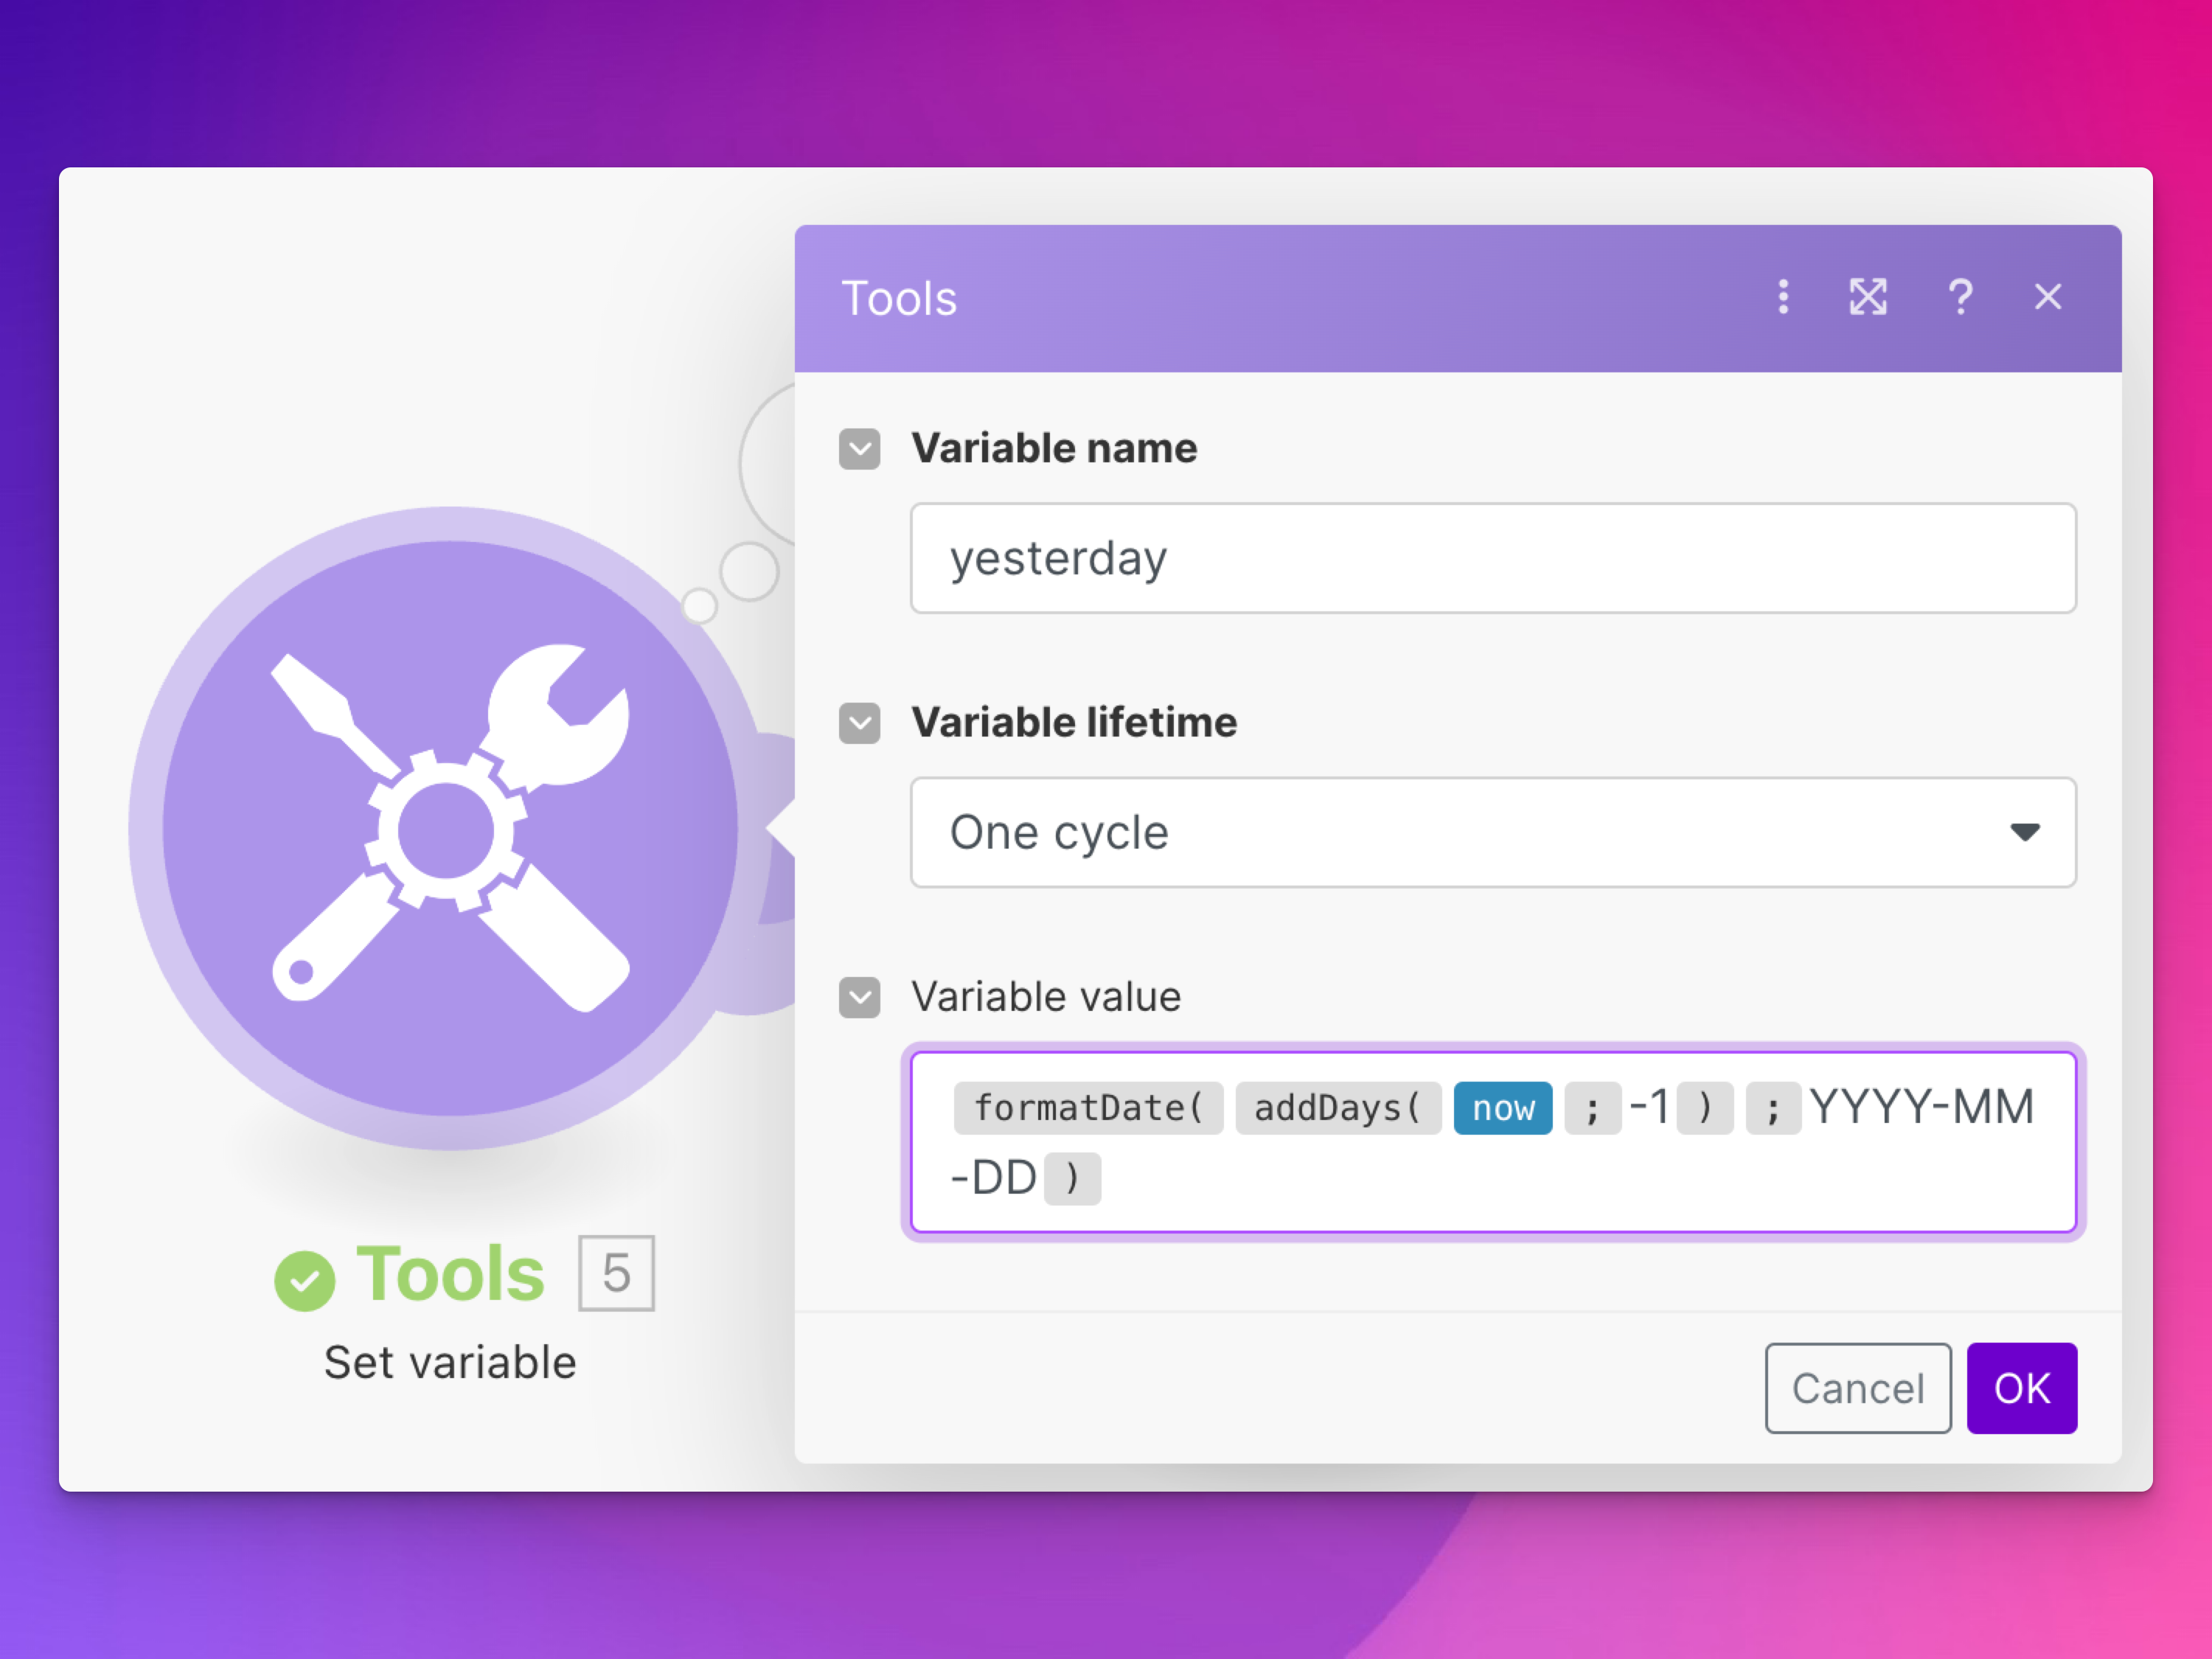
Click “OK”, right click on the tools module, and choose “Run this module only” to see if it works. Click on the little speech bubble to see the results and you should have a variable value that contains yesterday’s date in the output section:
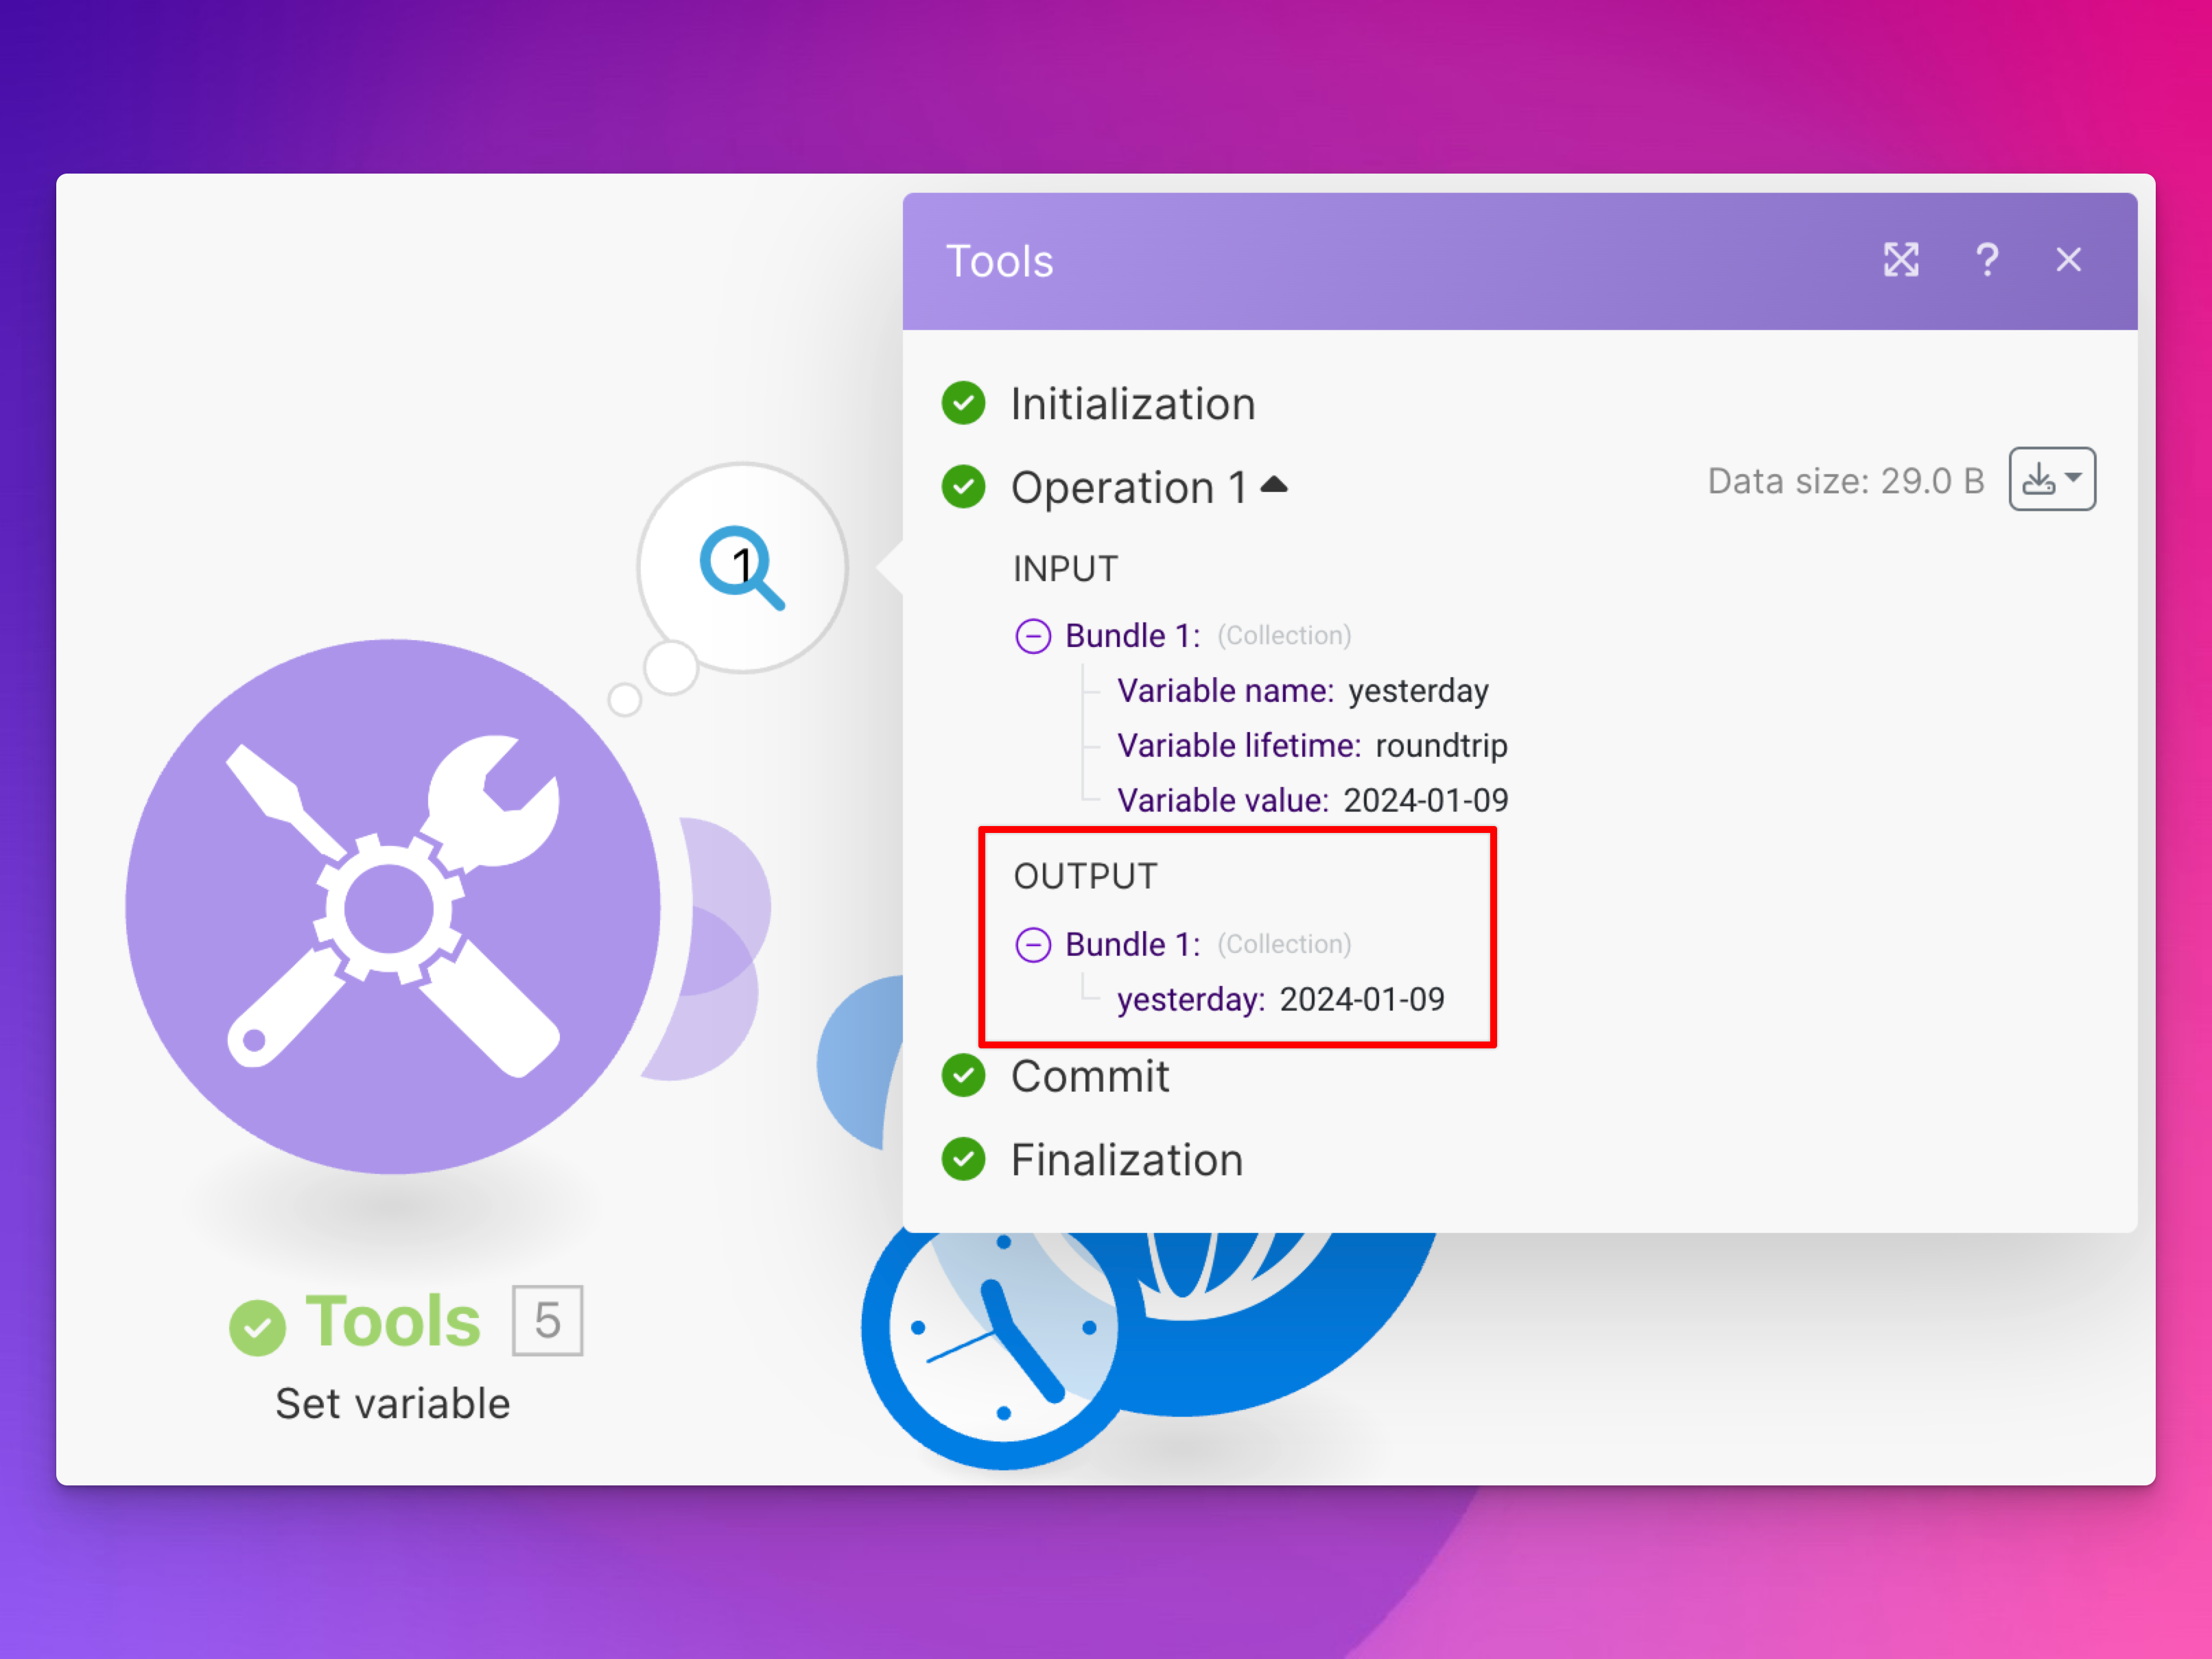
We can now use that date as part of the URL we send to the Fitbit API. With that tools module connected to the HTTP module, click on the HTTP module to change its settings. In the URL part, remove the manual date in the URL and replace it with the value of the “yesterday” variable:
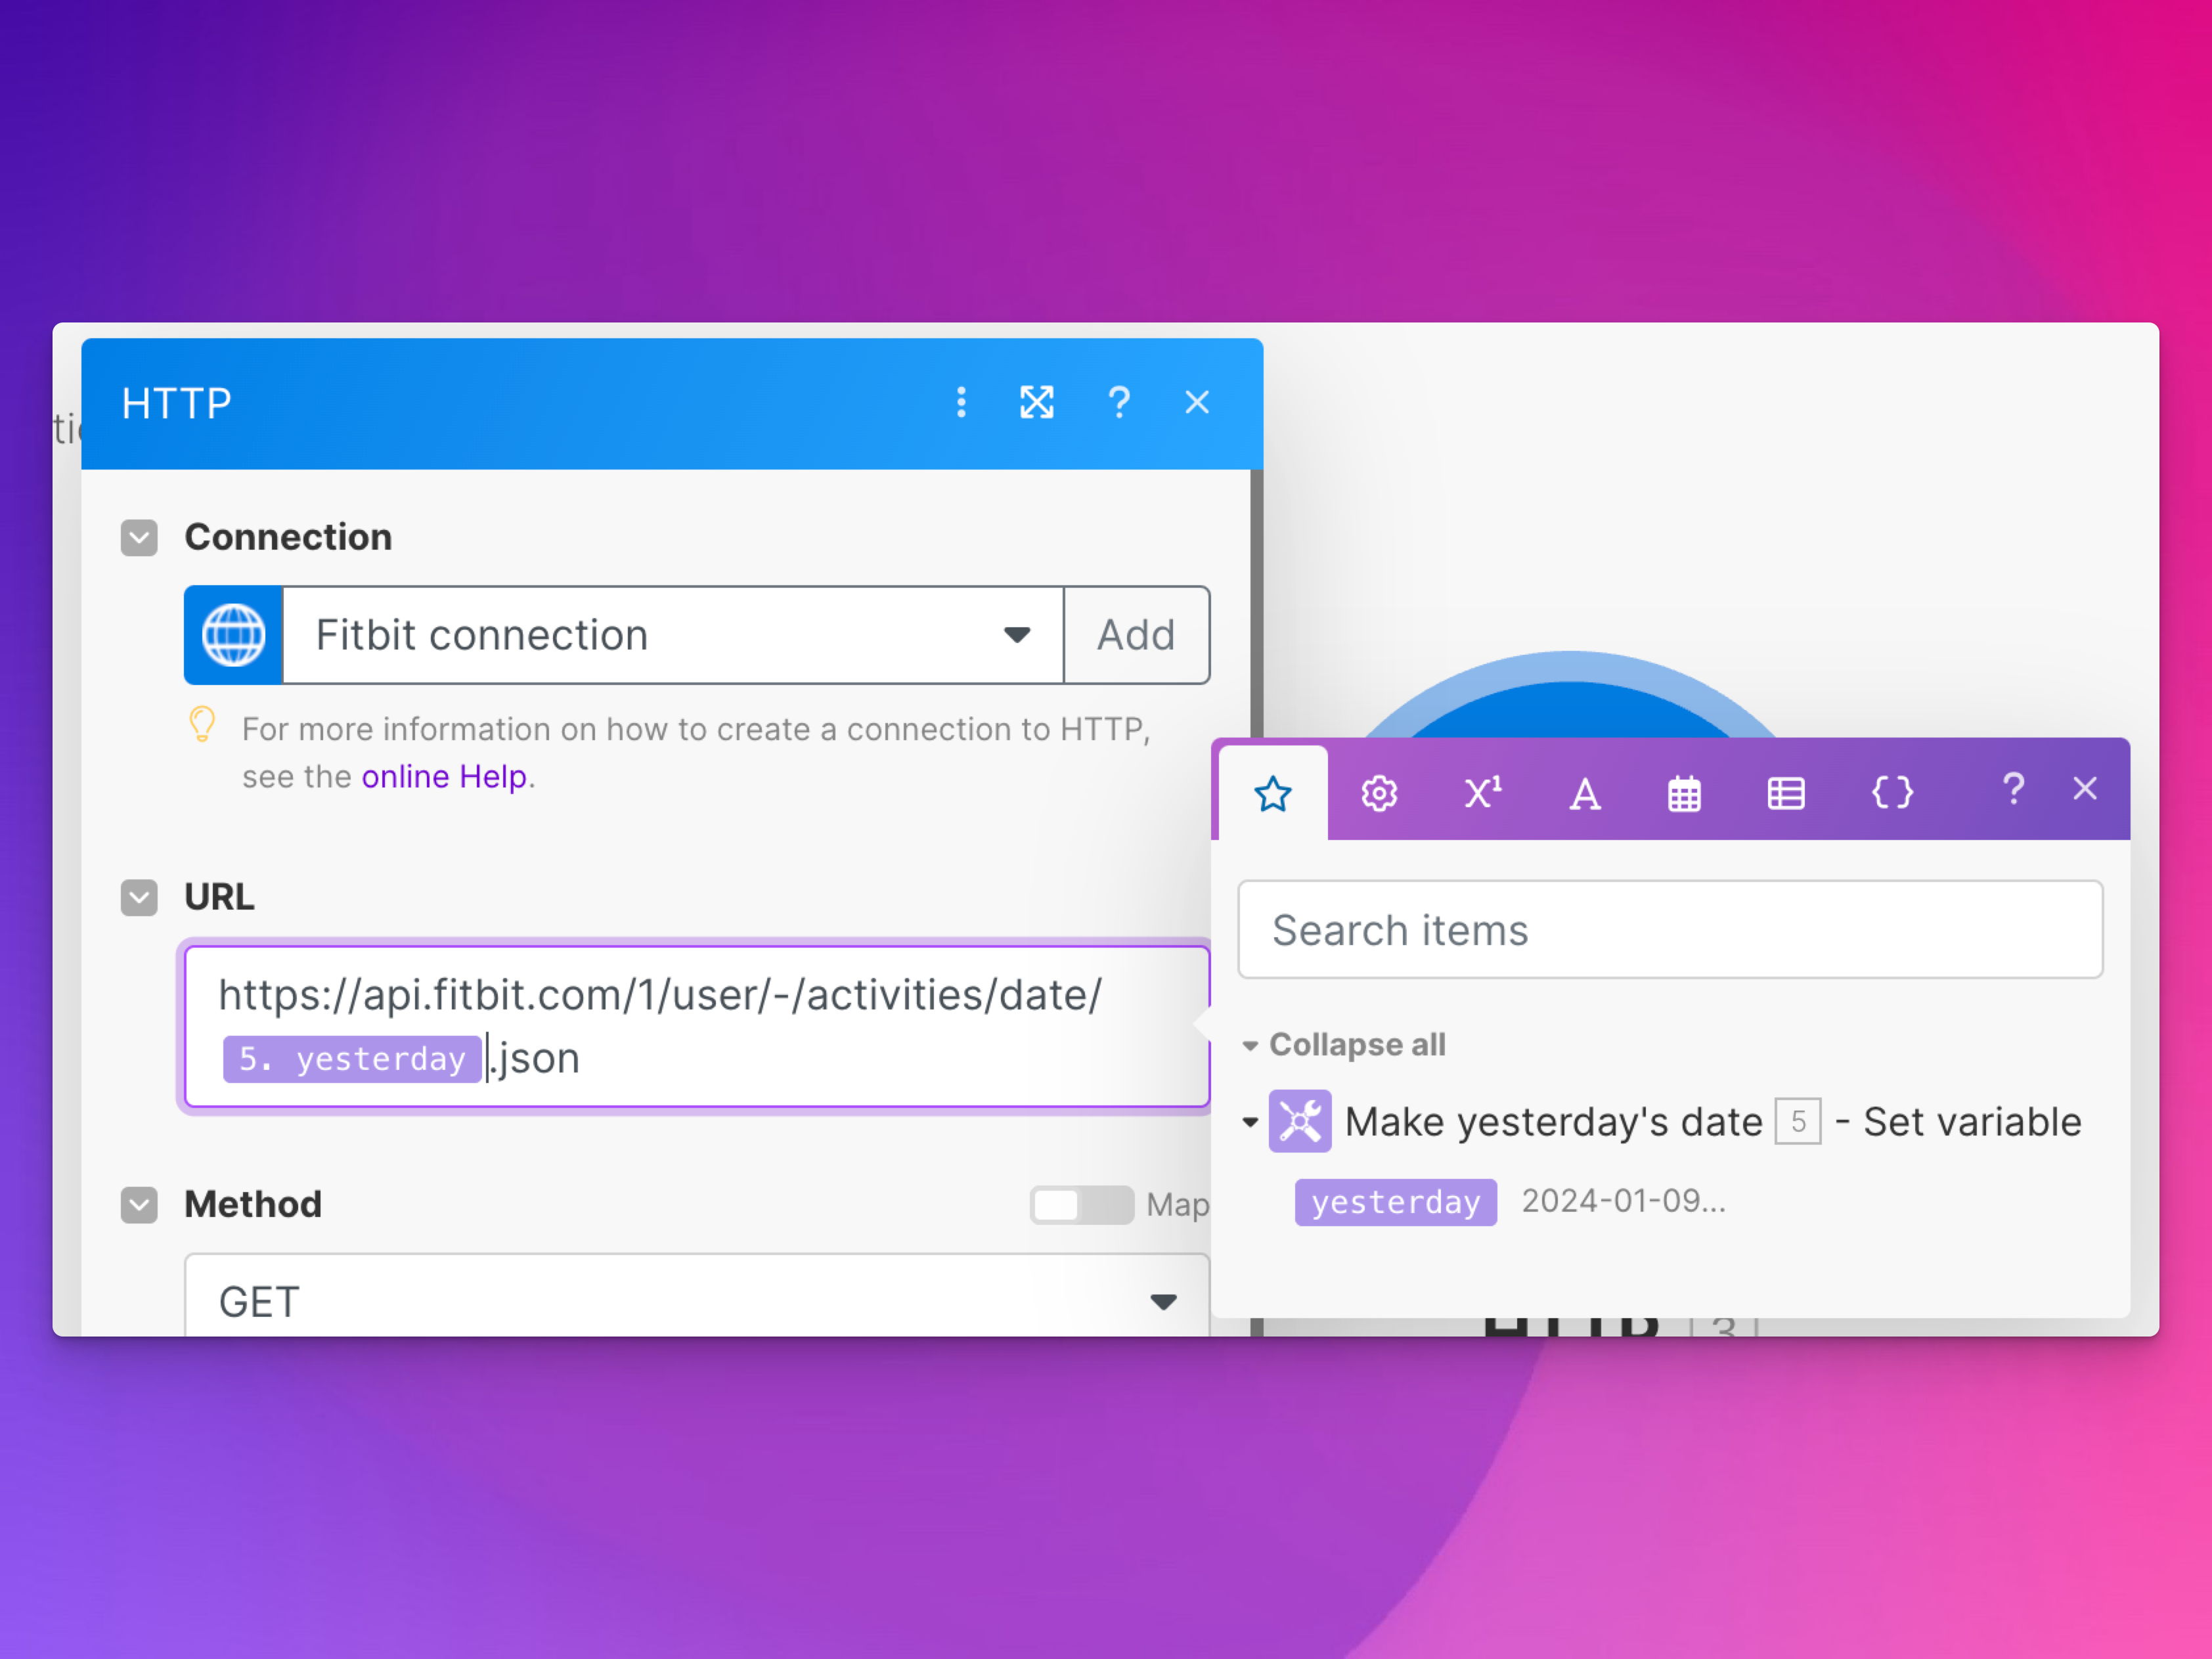
Click OK and run the scenario. Make should generate yesterday’s date and use it to grab yesterday’s activity summary from Fitbit. Magic!
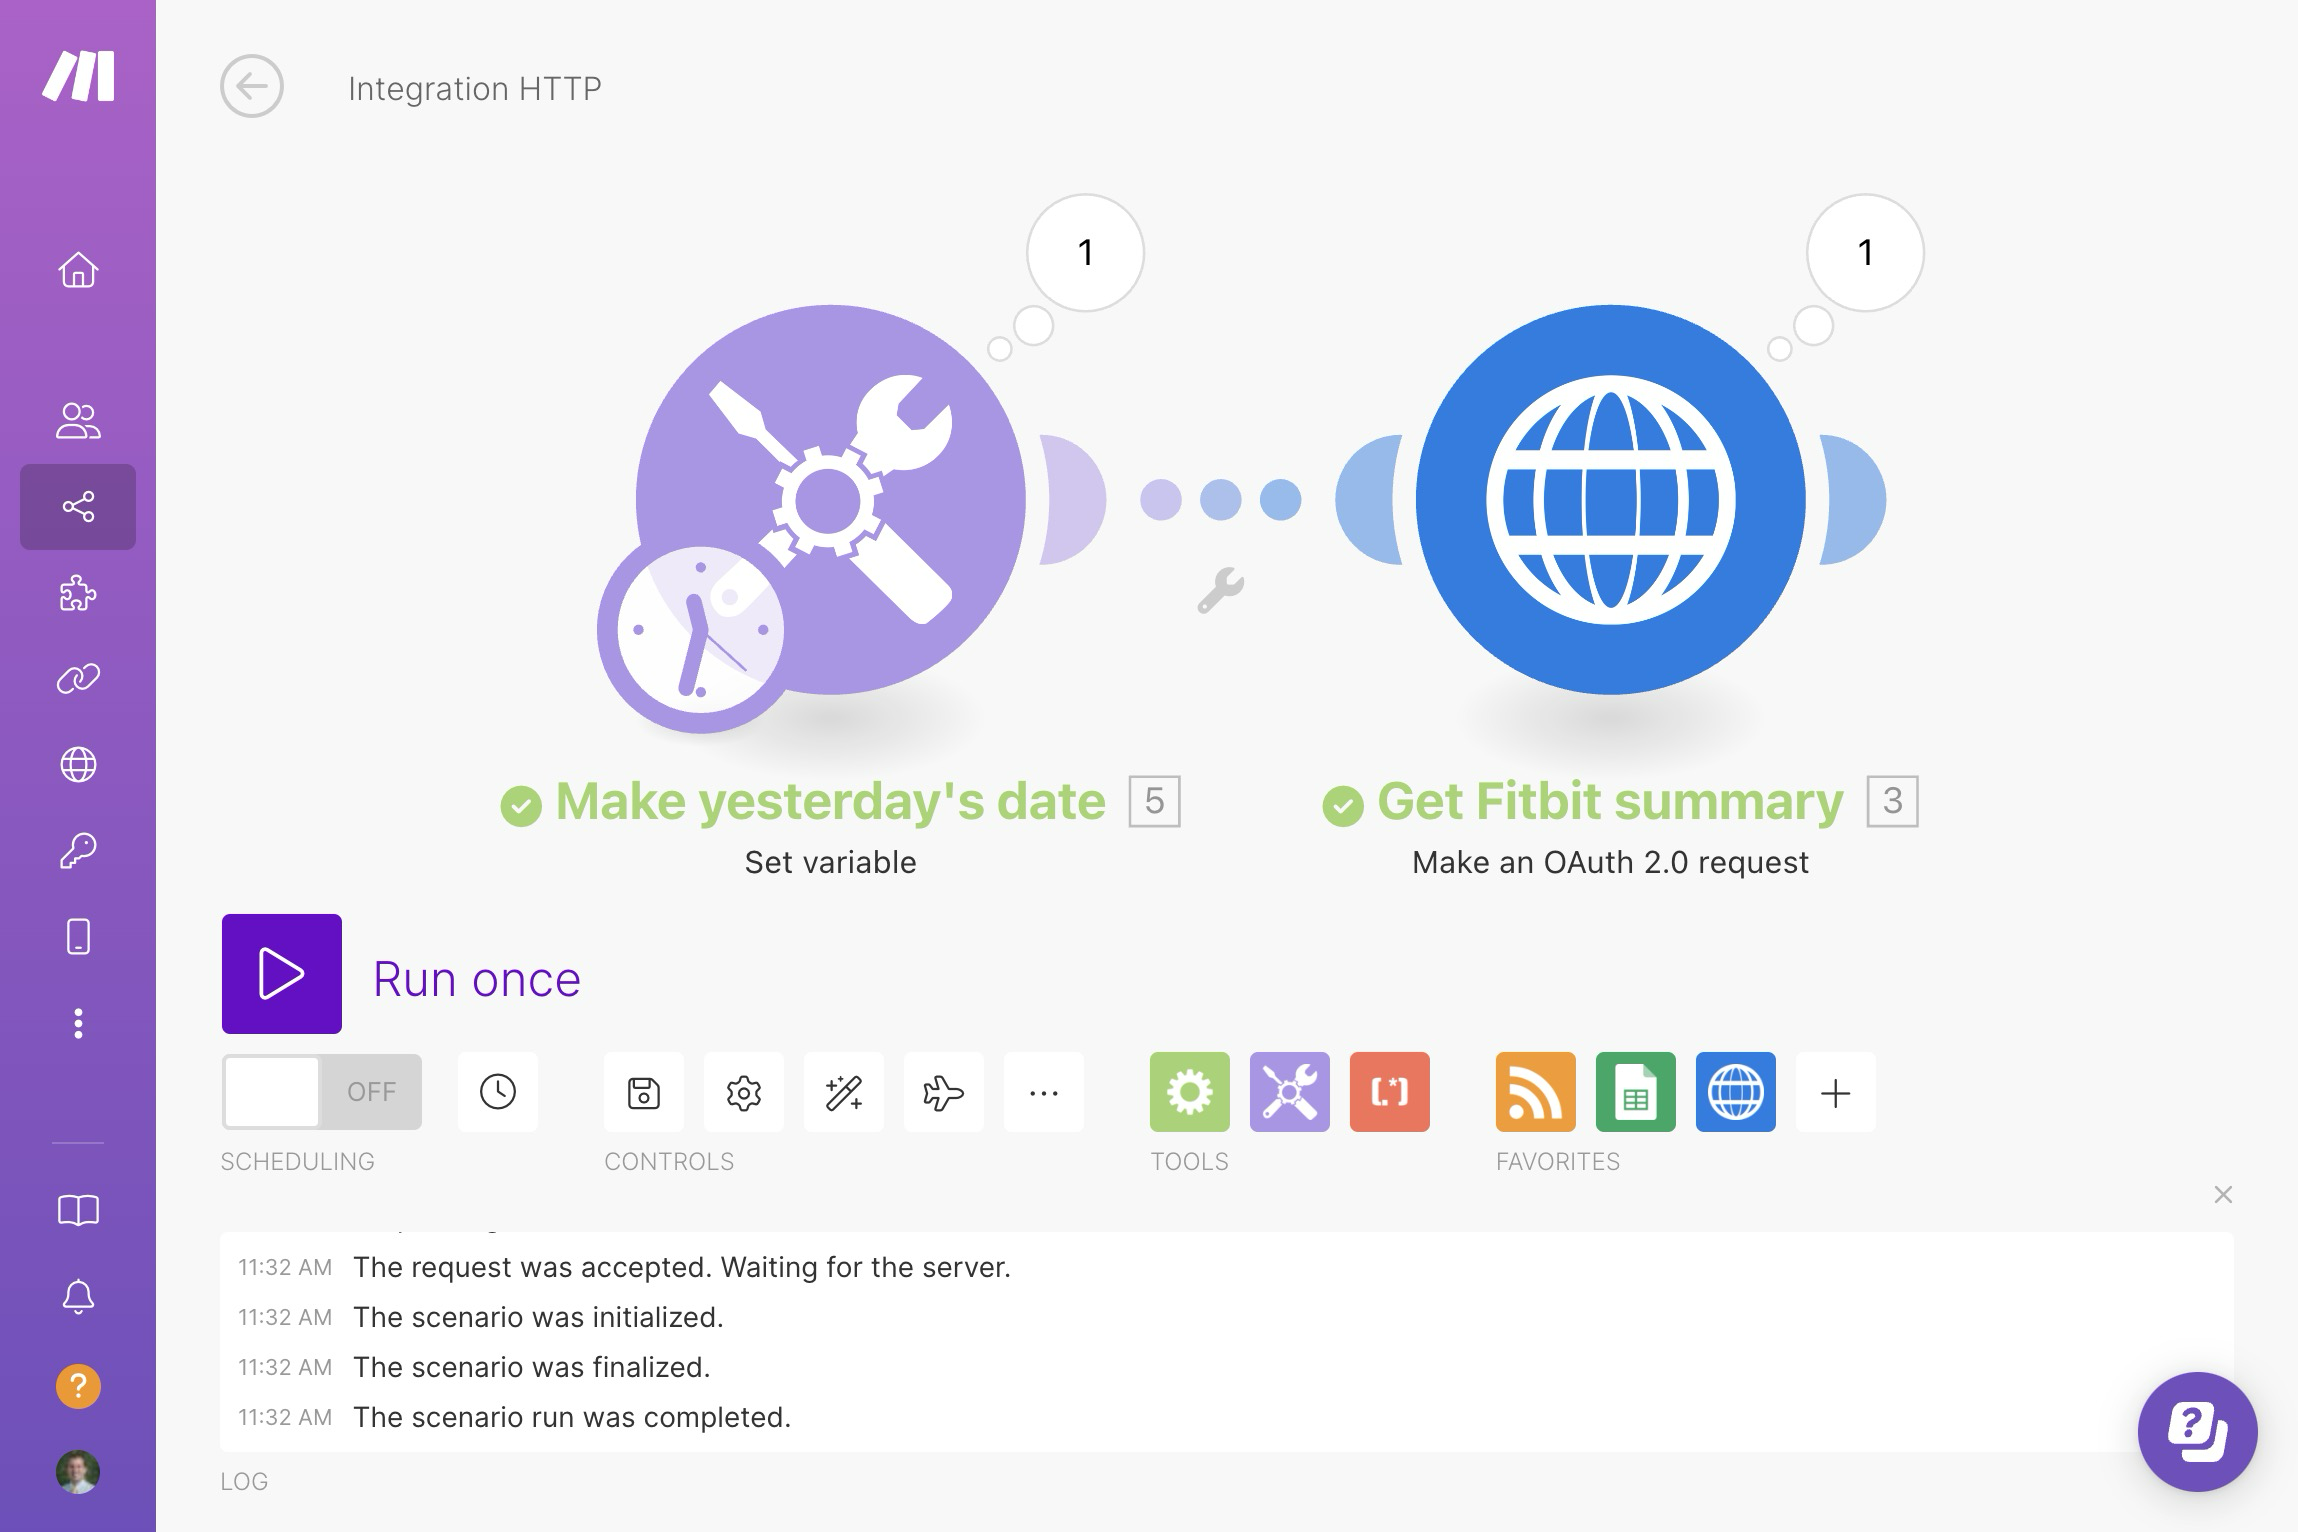
We can get now regularly get data from Fitbit, but we have to do something with it. In the RSS example, we stored a bunch of fields from the RSS feed as columns in a Google Sheet. We could do that here, but we’ll use Airtable, just for fun.
Go to Airtable, make a new account if you don’t have one already, and make a new base and table. With the Goodreads example, we made columns for all the different Goodreads feed items, like title, author, rating, and so on. Here we won’t do that. The Fitbit data is a lot more complex, with all sorts of nested data (like if you have multiple activities during the day, you’ll get a nested list with items for each activity). Processing and cleaning all that nested data is messy and hard and while I guess we could maybe force Make to do it, I don’t want to try. Instead, we’ll just save the whole JSON object to Airtable and then work with it later in R.
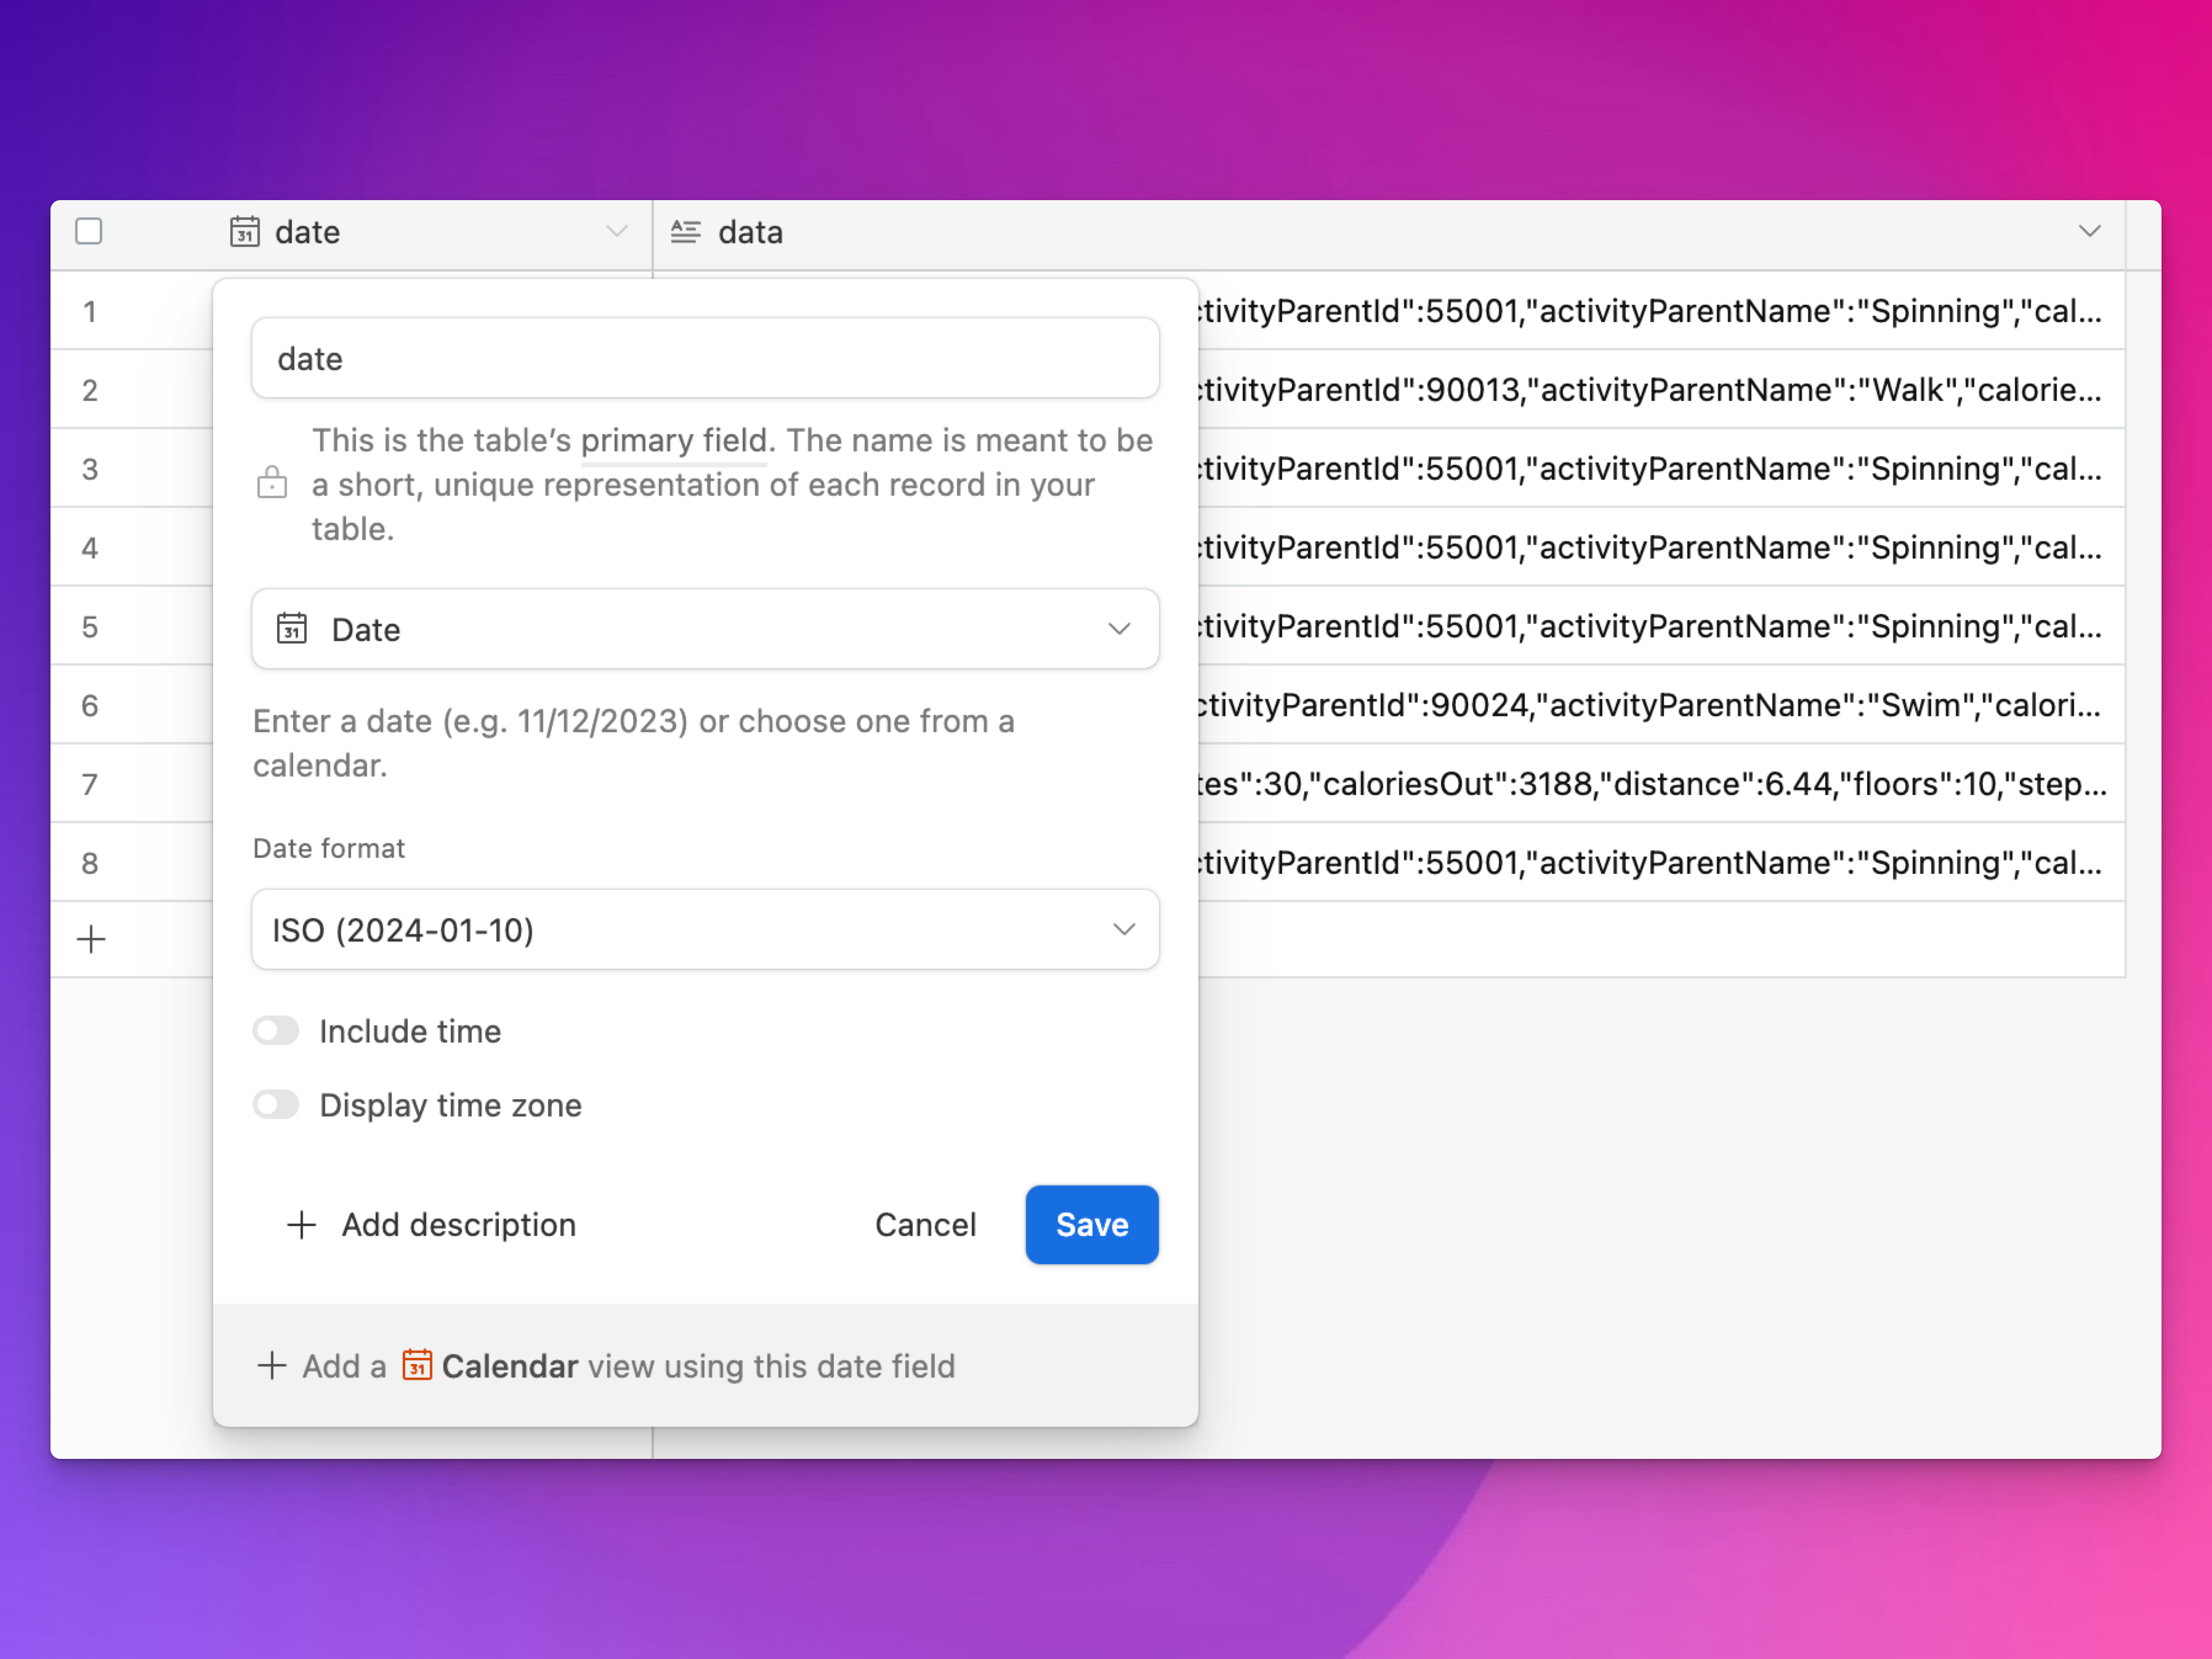
In your new table, make sure there’s a column for the date and one for data. These can be named whatever you want—just make sure that the date column uses the date type and is formatted as ISO (YYYY-MM-DD) and that the data column uses the long text type:
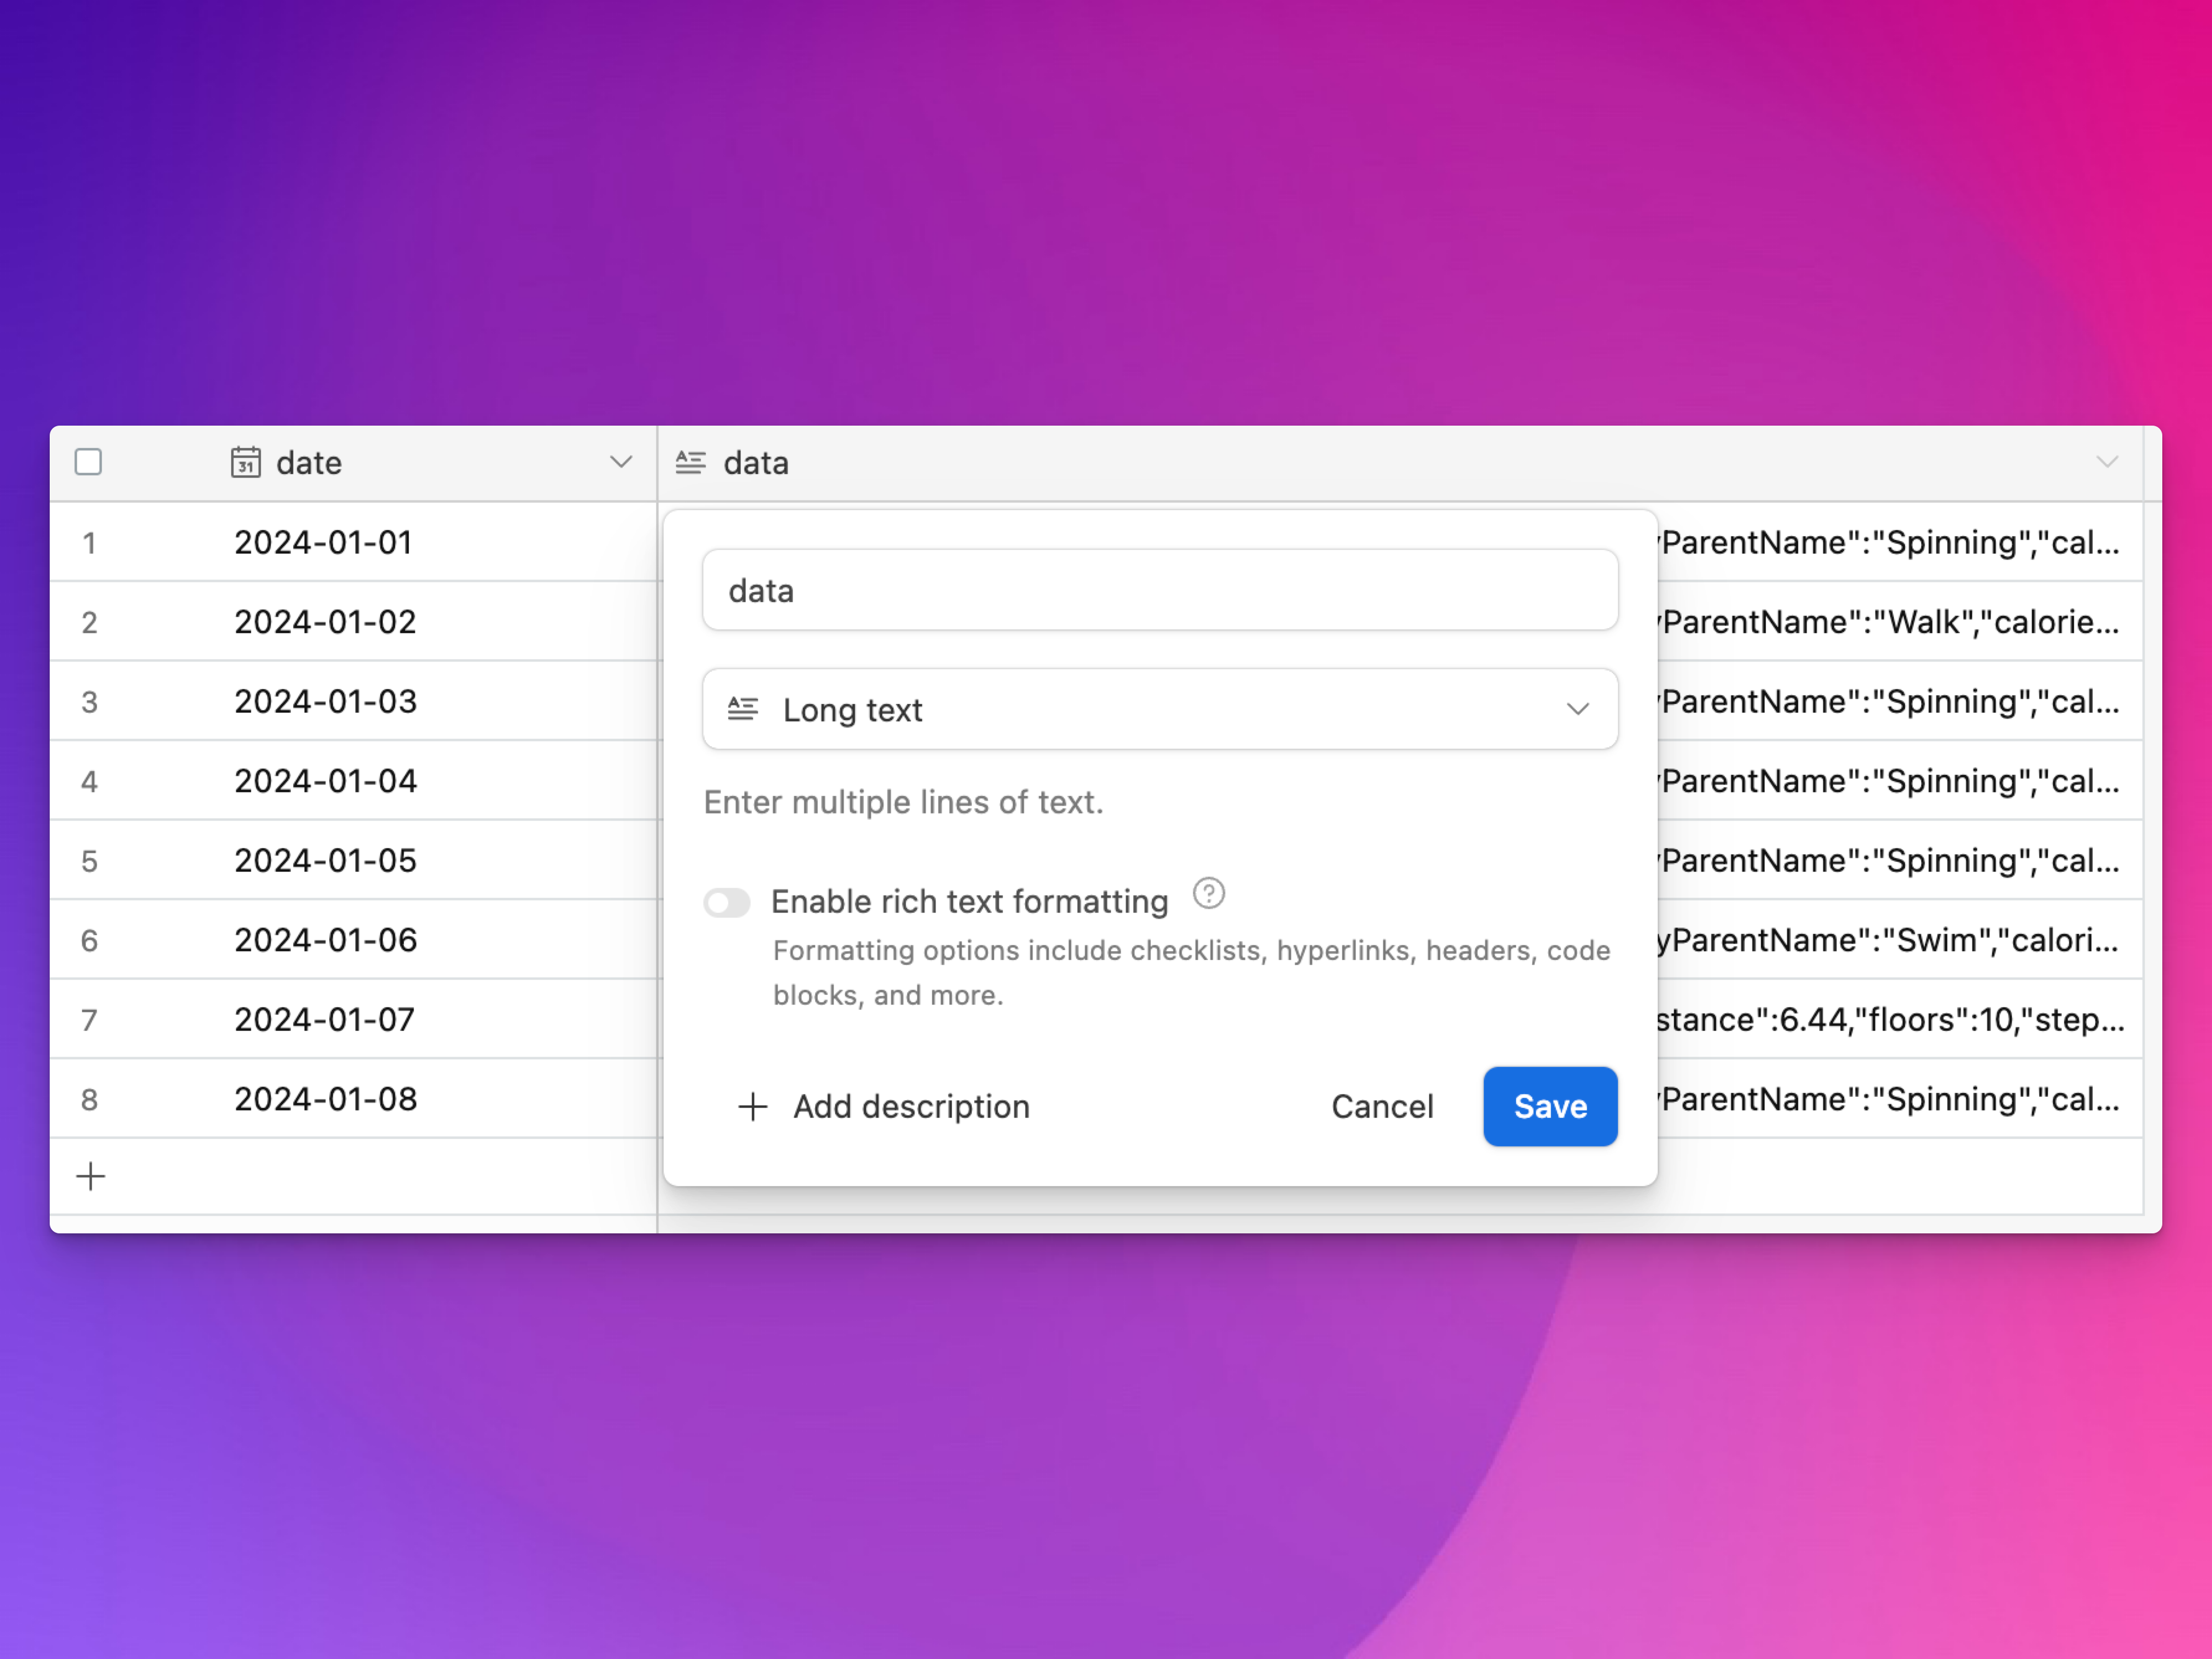
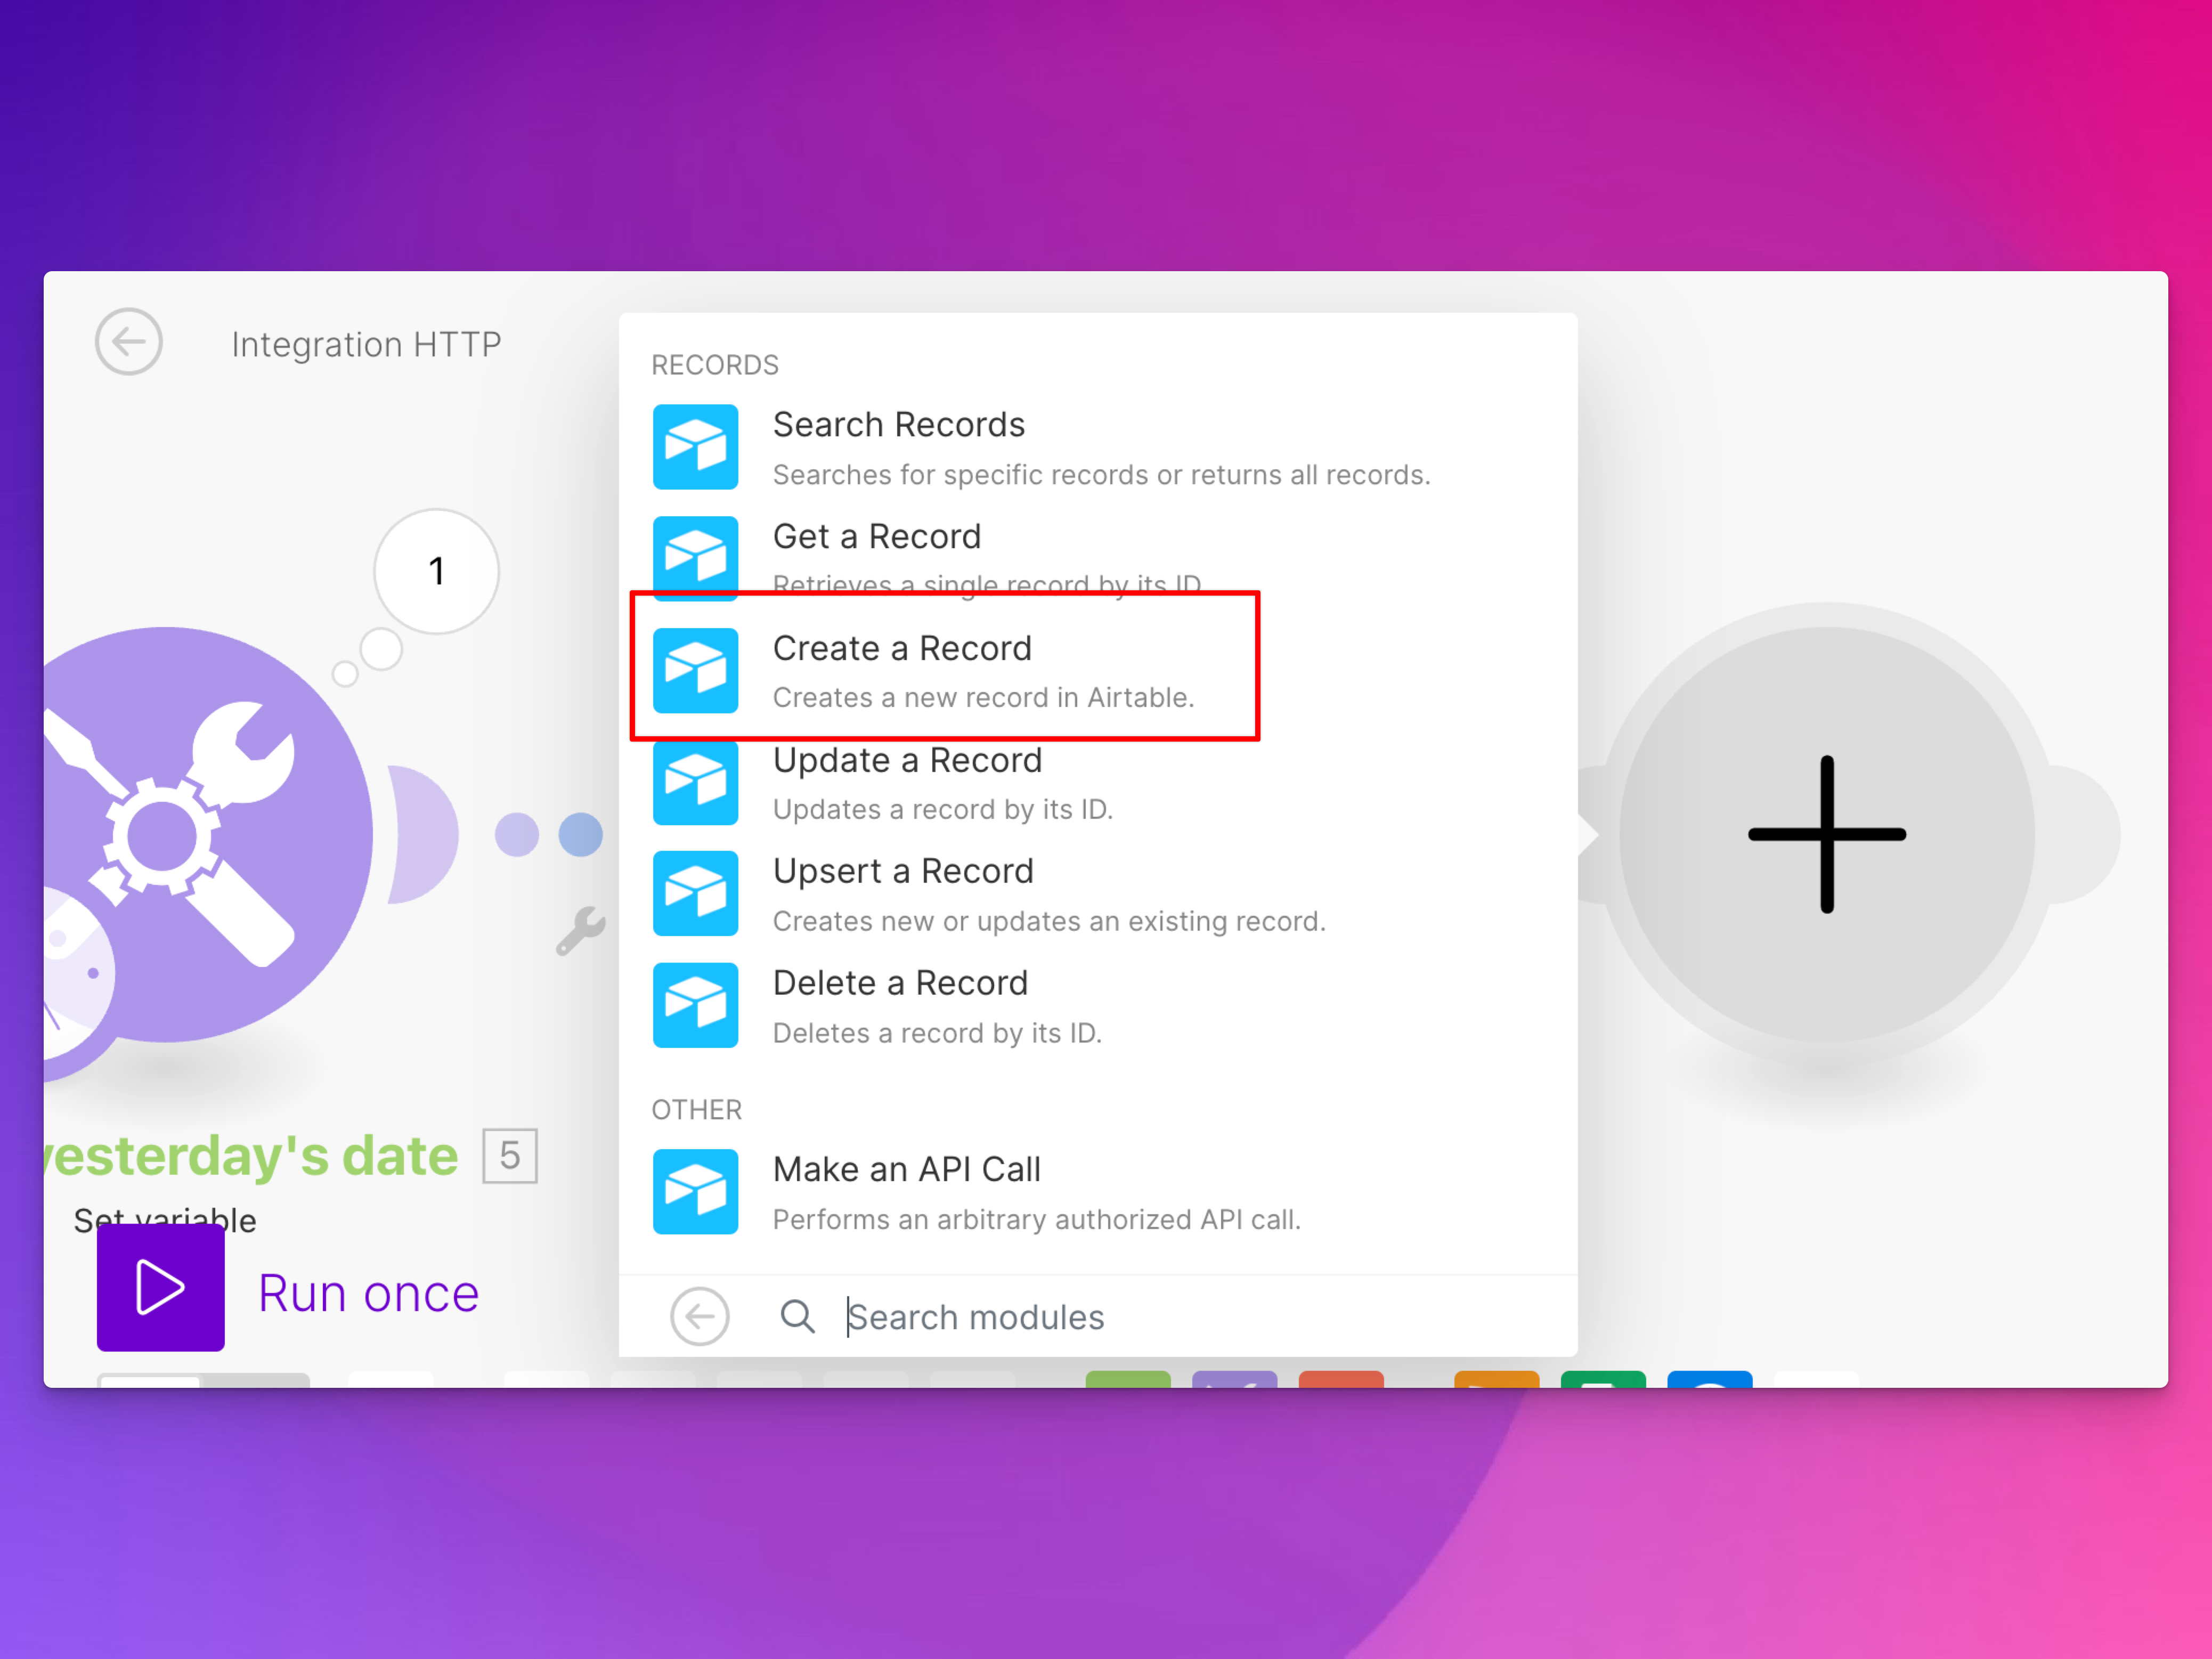
Back at your Make scenario, add a new module for creating a record in Airtable:
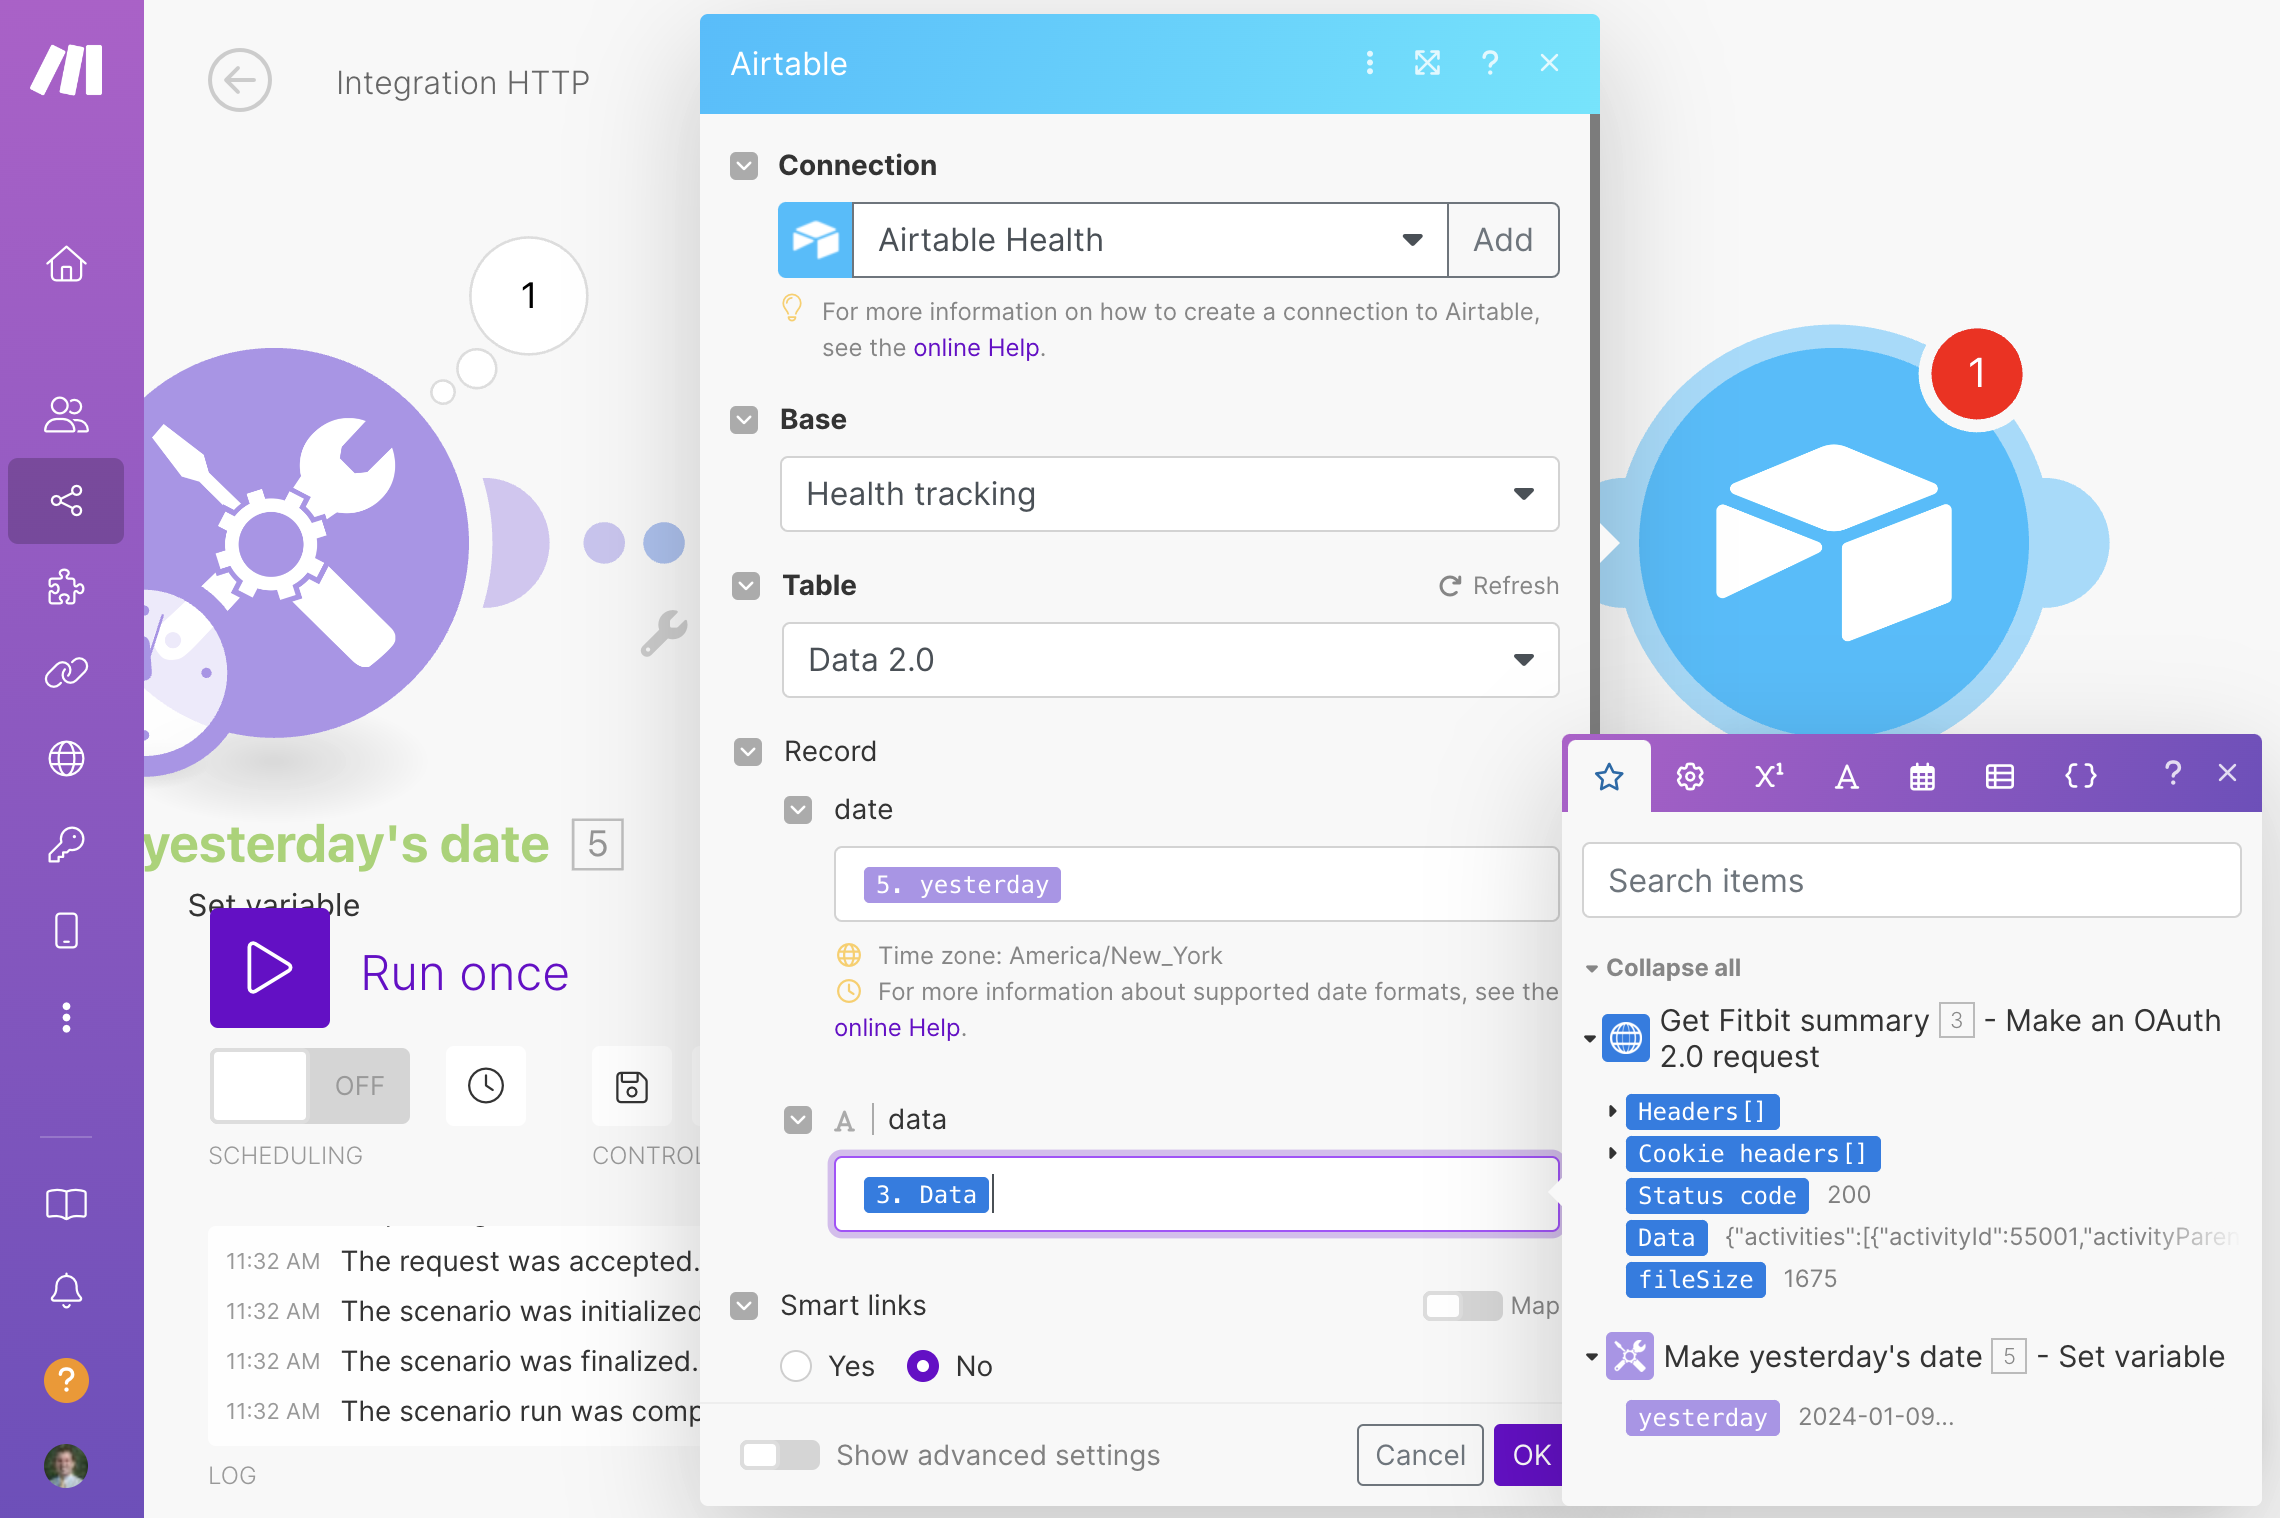
Add a new connection to your Airtable account, which will authorize Make to access Airtable. Then choose the base and table you want to insert stuff into. Tell it to insert yesterday’s date as the date and to insert the whole Data JSON output as the data. If we really wanted, we could insert a special Make module that parses the JSON before it gets to the Airtable module so we can extract specific pieces from the data, but that’s hard and using R to work with JSON is a lot easier, so we’ll just store the complete raw JSON results.
And that’s it! Run the scenario and it should get yesterday’s data from Fitbit and insert the raw JSON into Airtable.
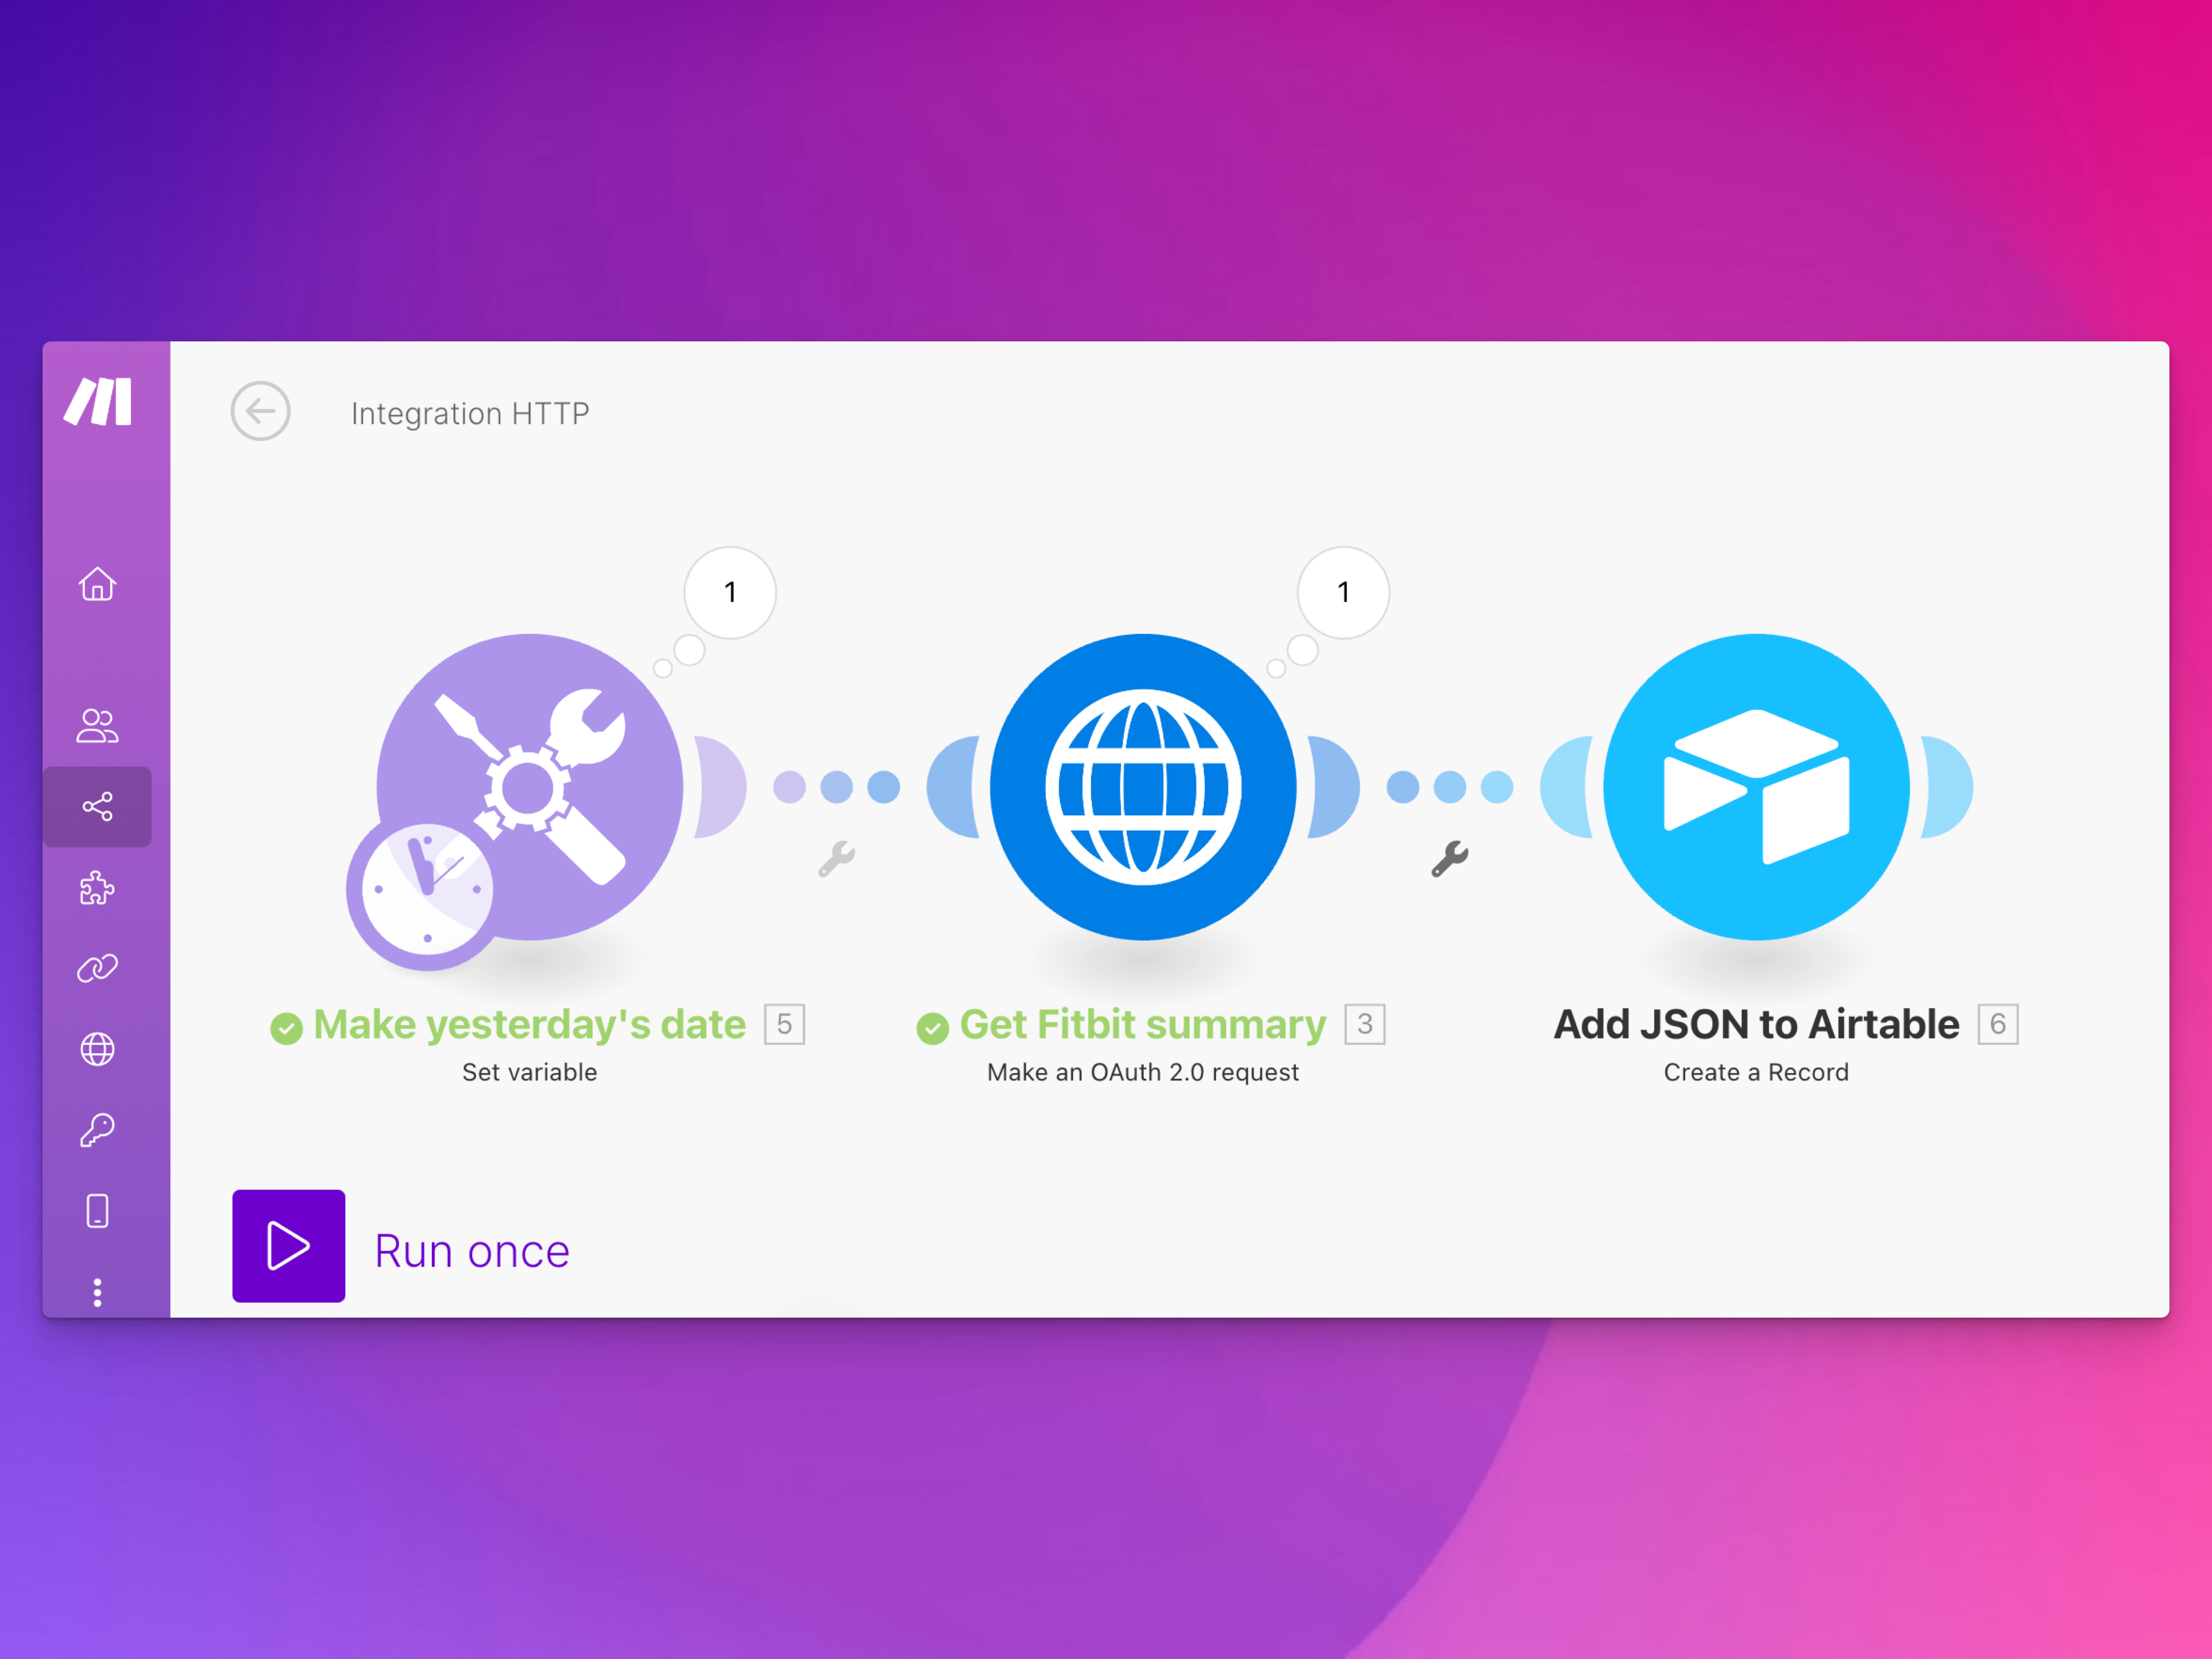
If you want to collect earlier dates, you can change the URL in the HTTP module to whatever date you want, or if you wanted to be super fancy, you could create an Iterator module to loop through a bunch of past dates. Set a schedule for the scenario, like having it run once a day at some specific time, and it should just work.
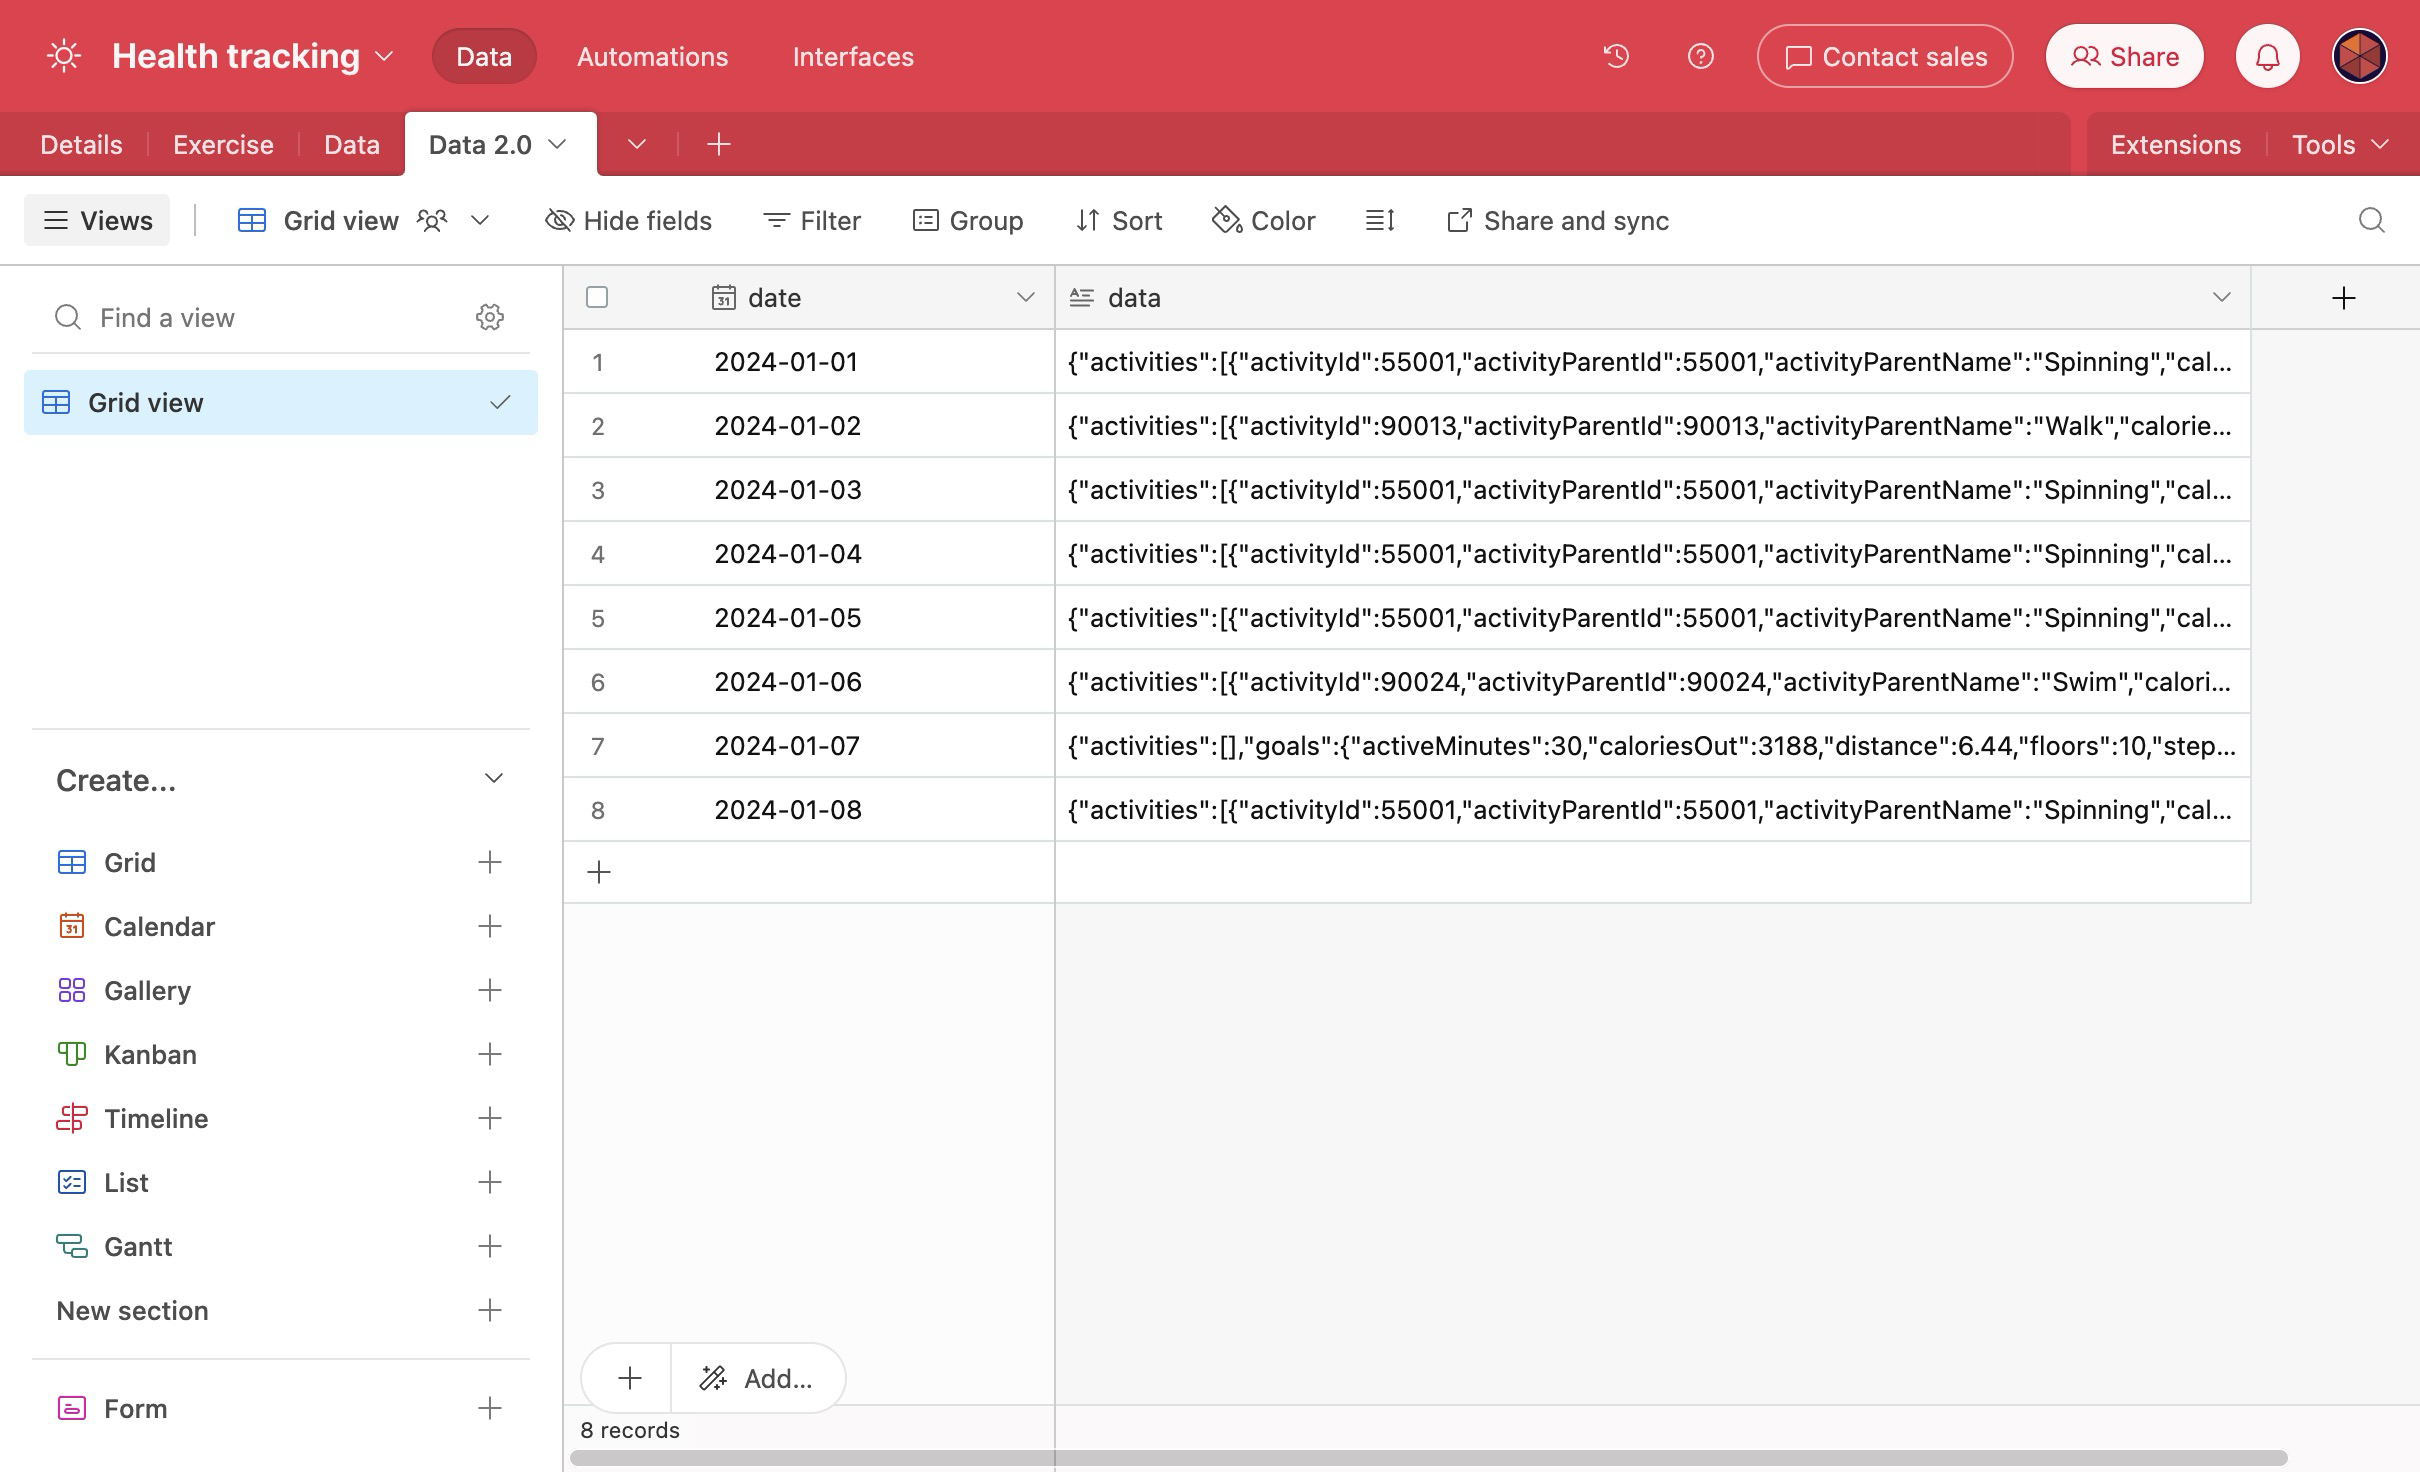
Your Airtable table should look something like this:
